

Workflows and activity
Save steps you repeat, follow long operations, and find the copies Pikebox prepares.
Create a workflow
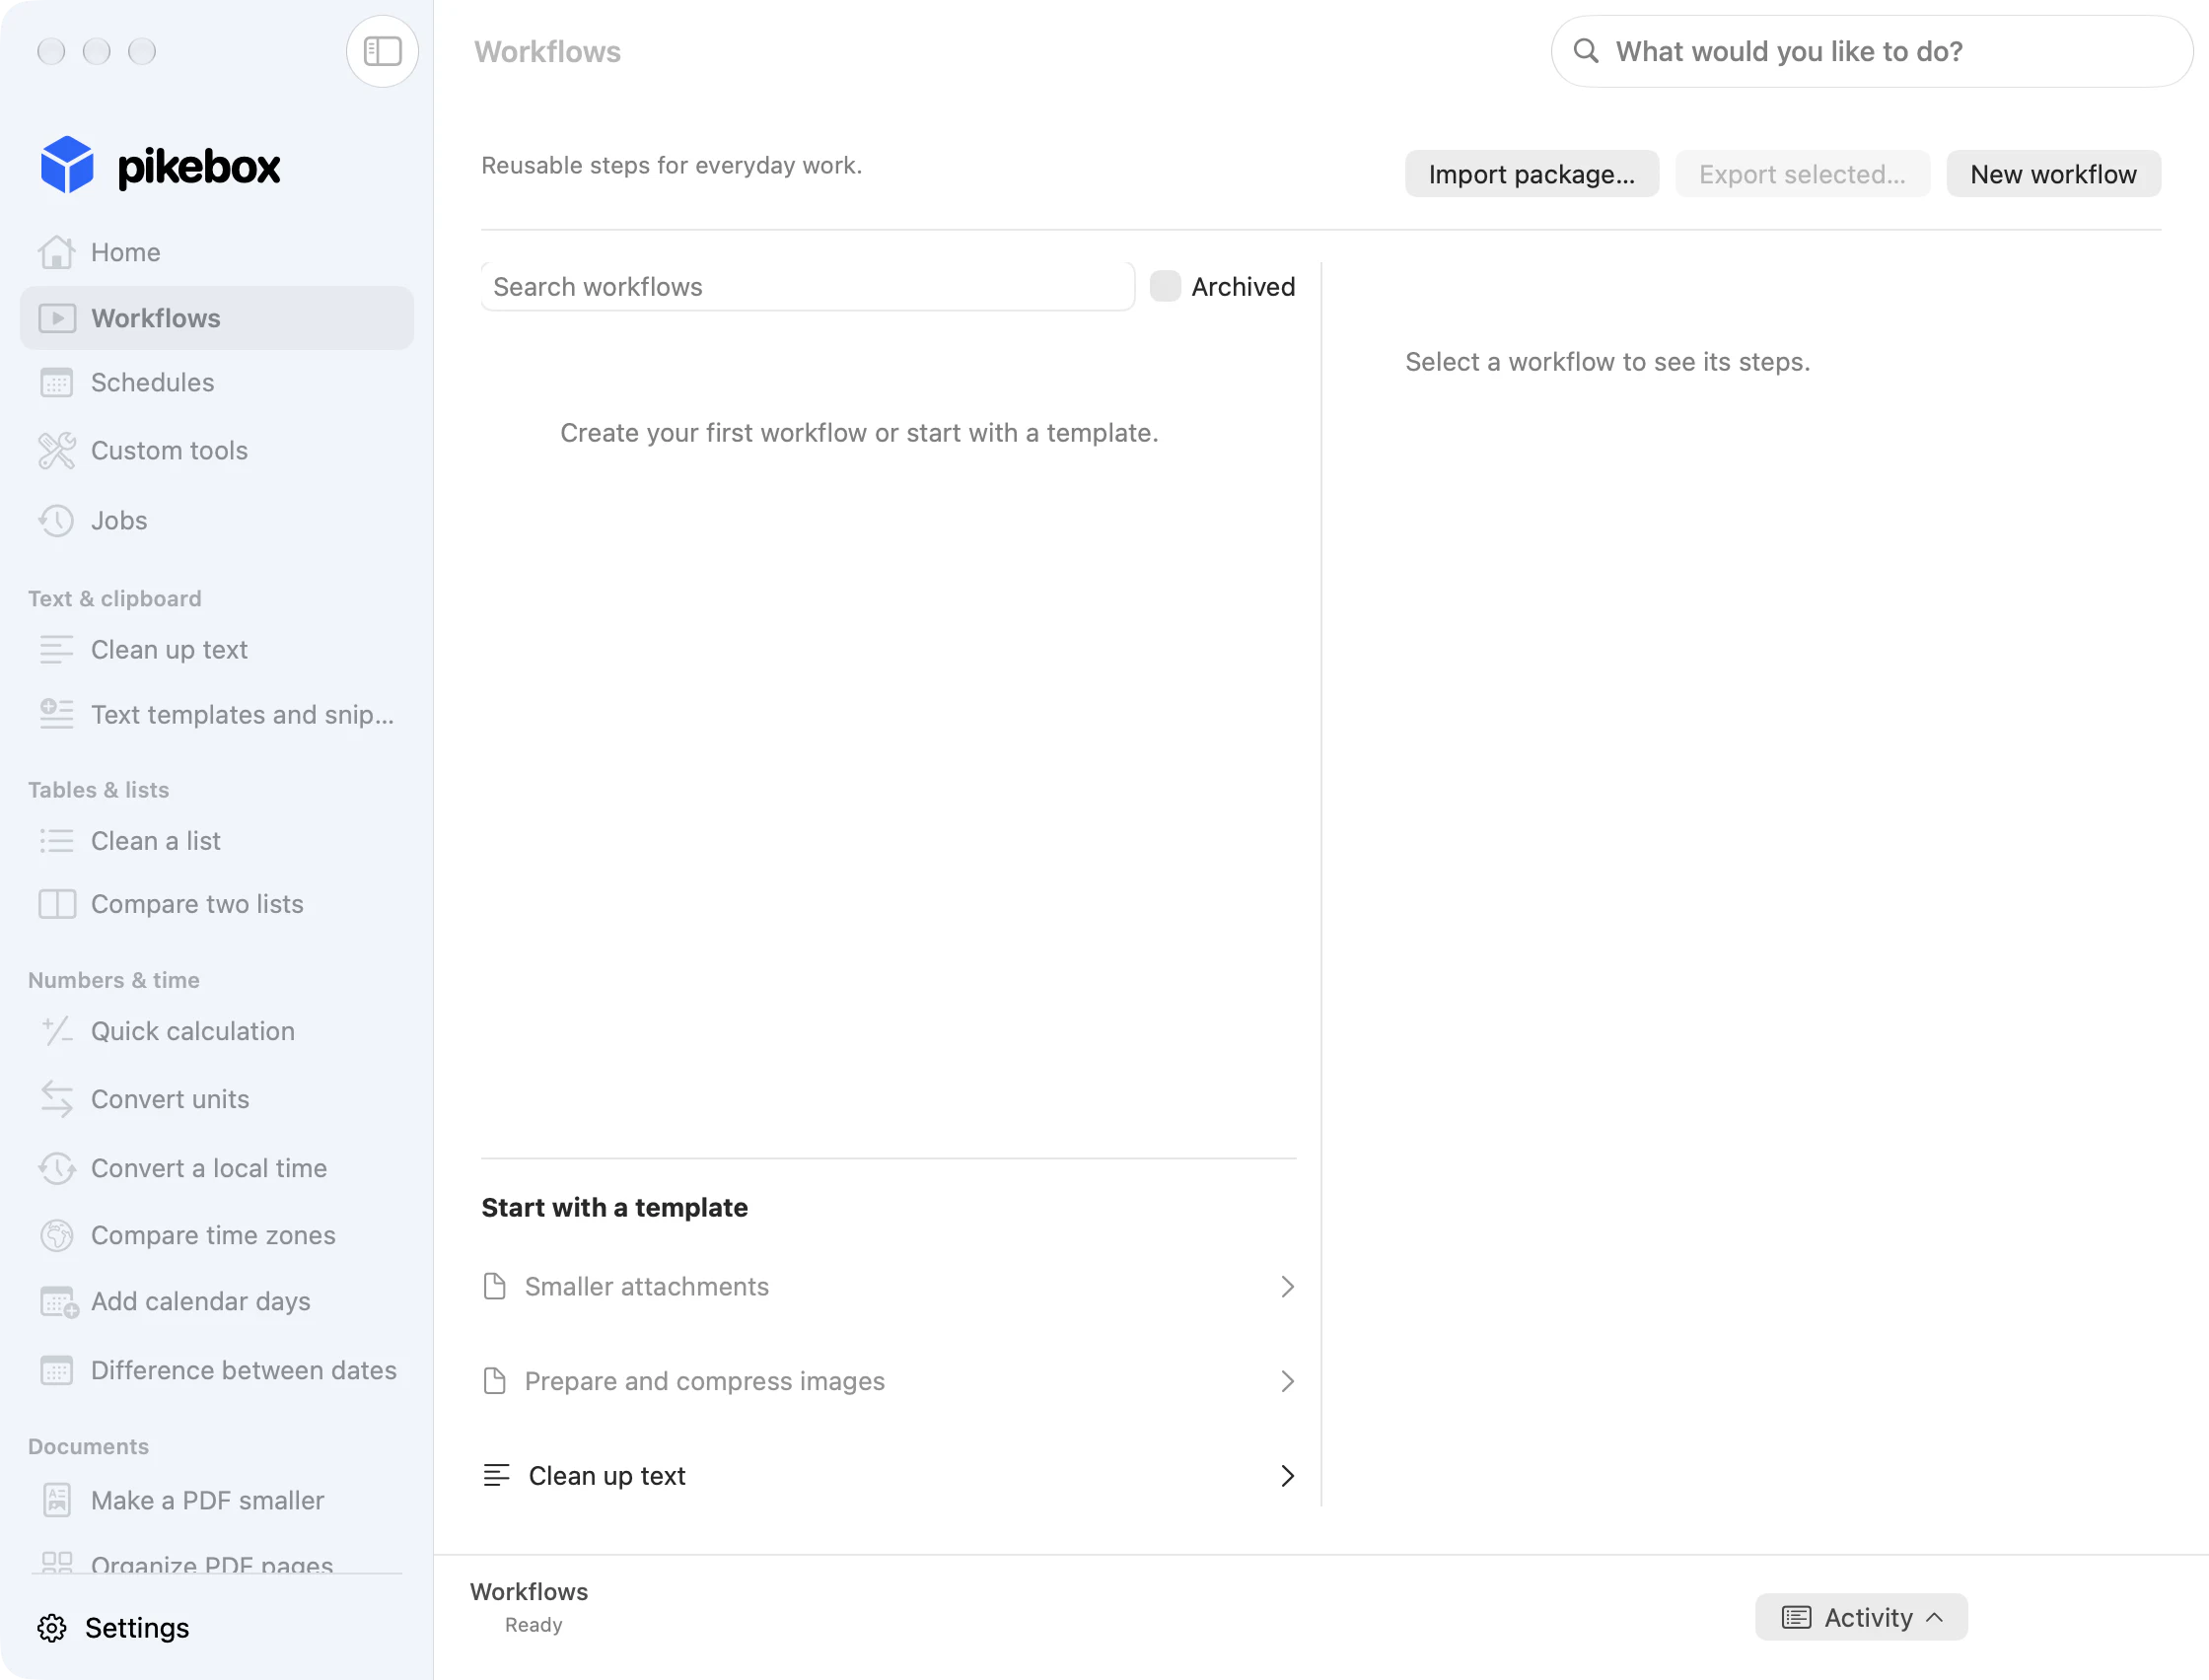
A workflow saves a sequence of steps you use often. For example, resize a folder of photos before sharing them.
- Open Workflows and choose New workflow, or start from Smaller attachments, Prepare and compress images, or Clean up text.
- Give the workflow a name you’ll recognize in the library and in Jobs.
Pikebox for Mac, shown in English.
Set up and edit steps
Choose files, folders or text
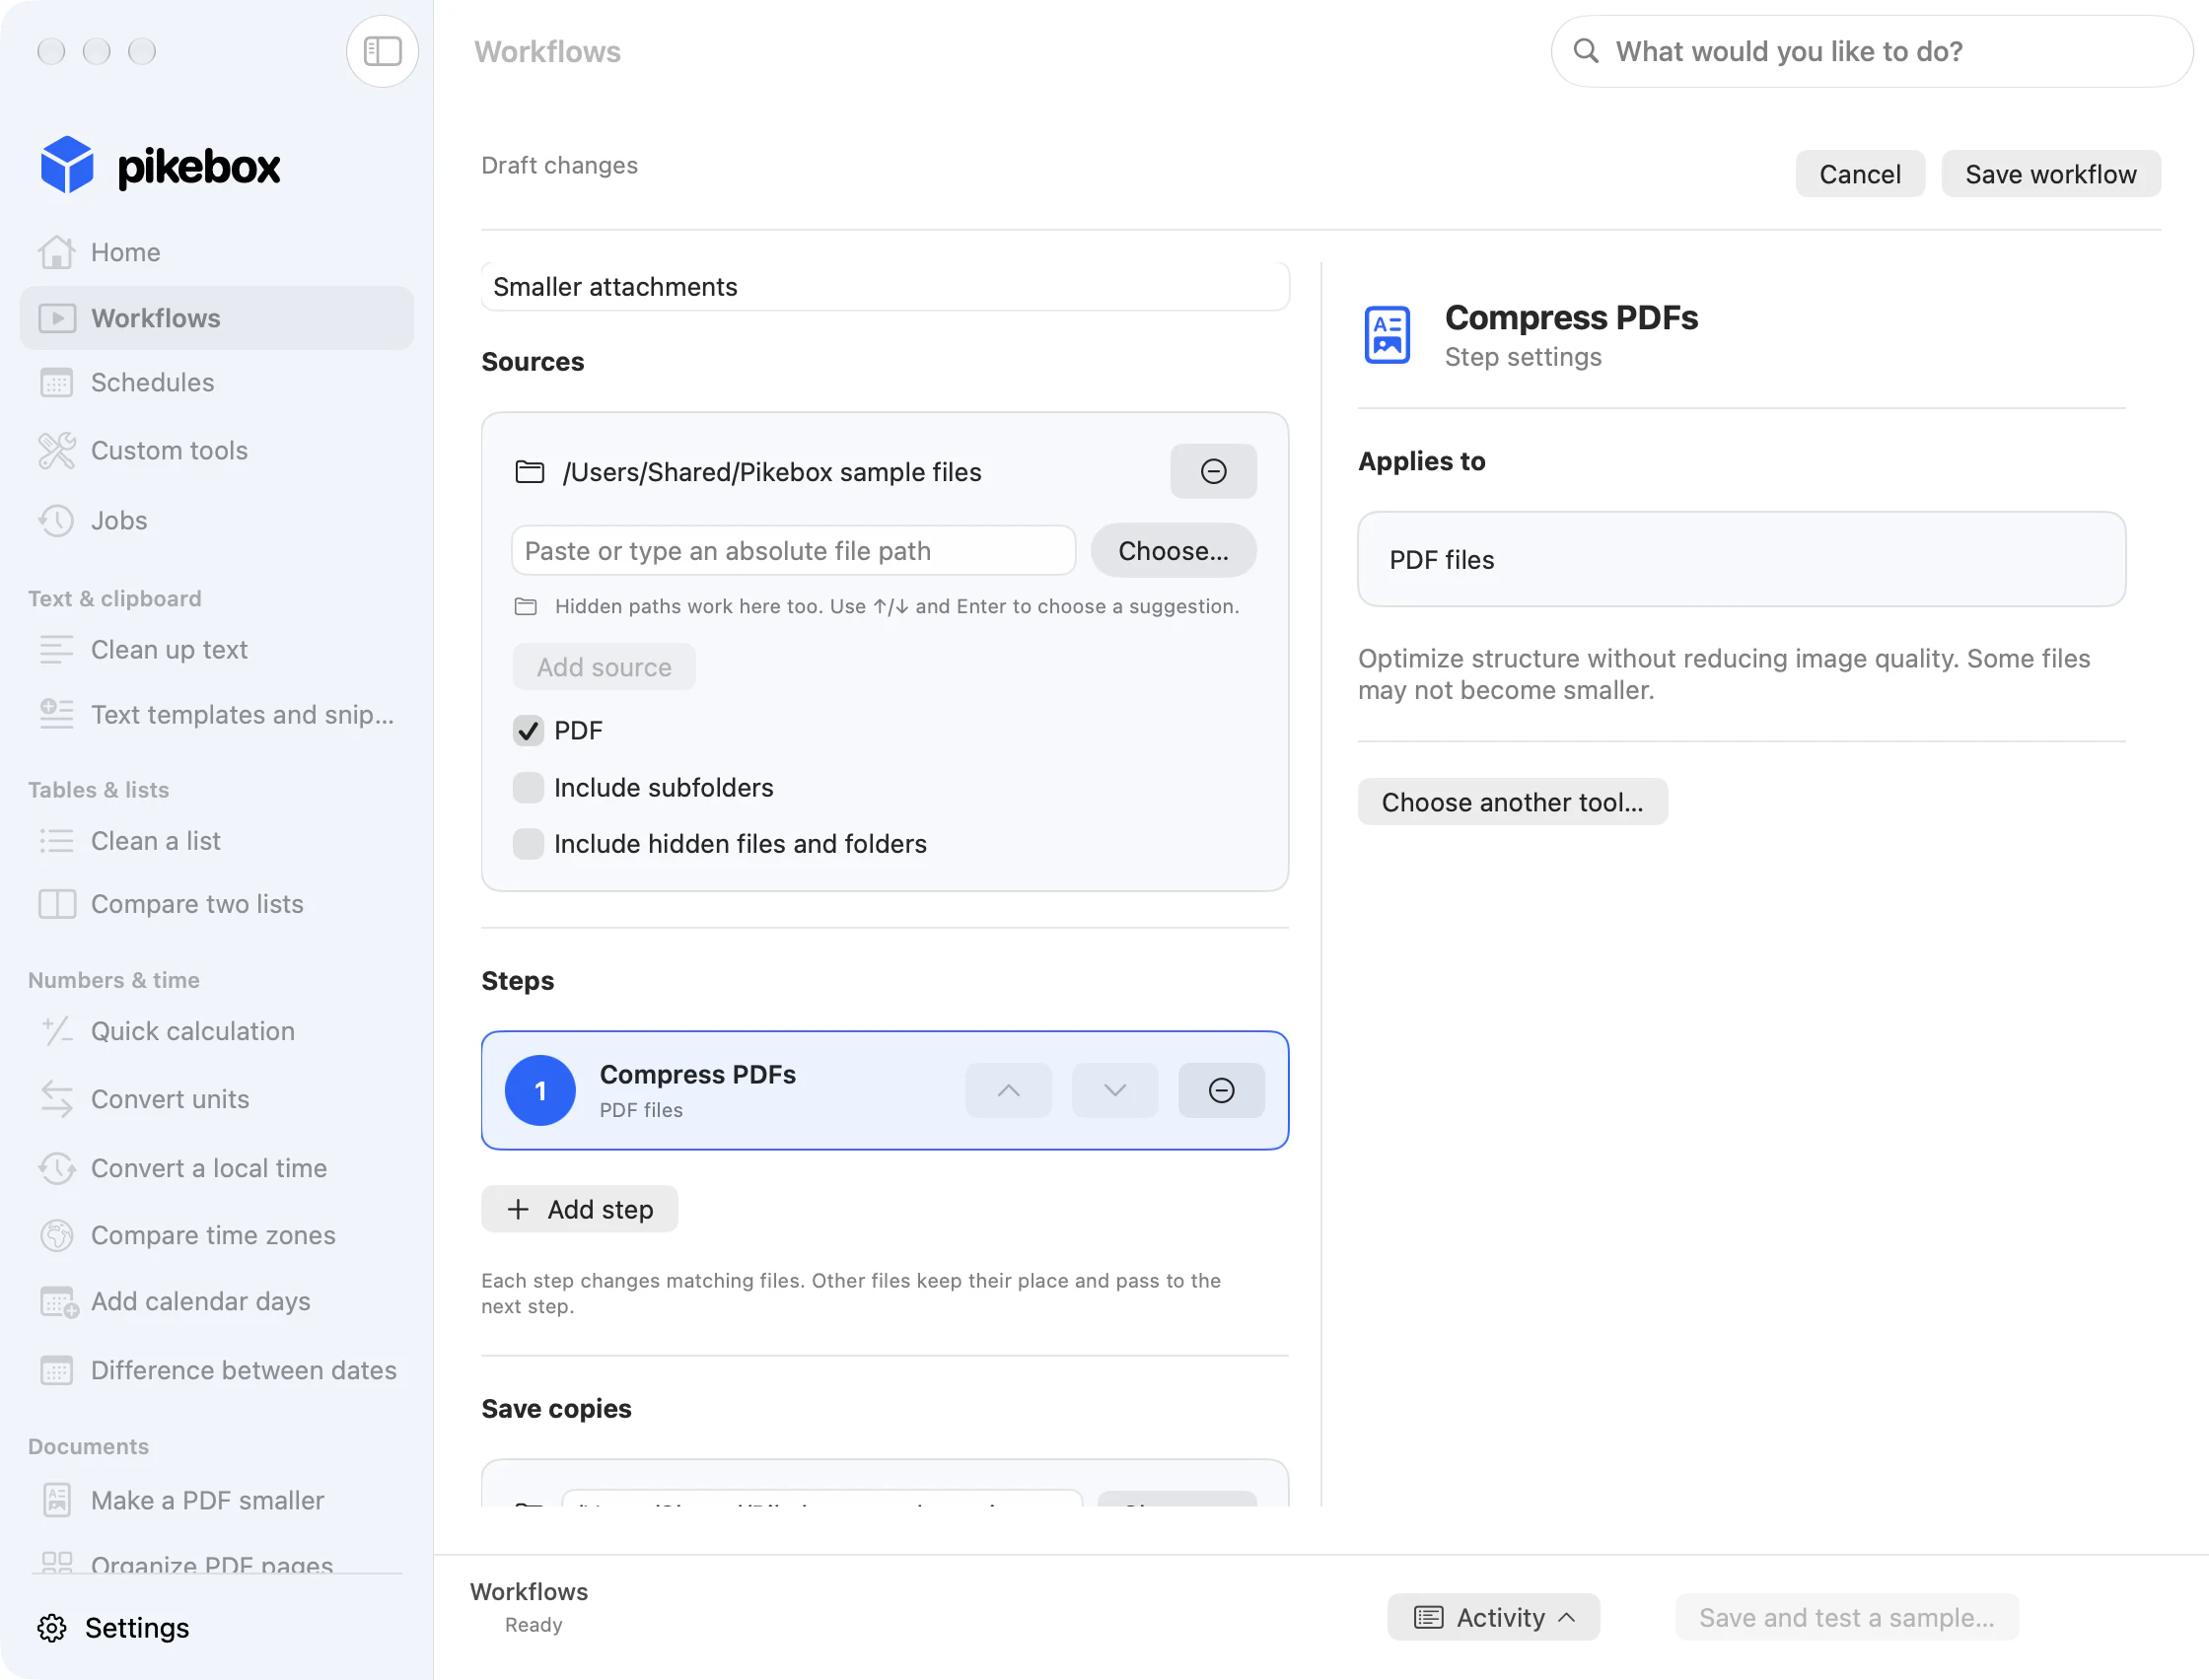
- Under Sources, choose specific files or select a folder to find matching files each time you run. To use a typed path, confirm the suggested path and use Add source. Use the minus button to remove a source.
- For folders, add a step first so its file types appear. Tick the types you want. Turn on Include subfolders or Include hidden files and folders only if you want to include those items.
- For text, start from the text template or add only text steps. Paste the text into Text input.
Build the steps in order
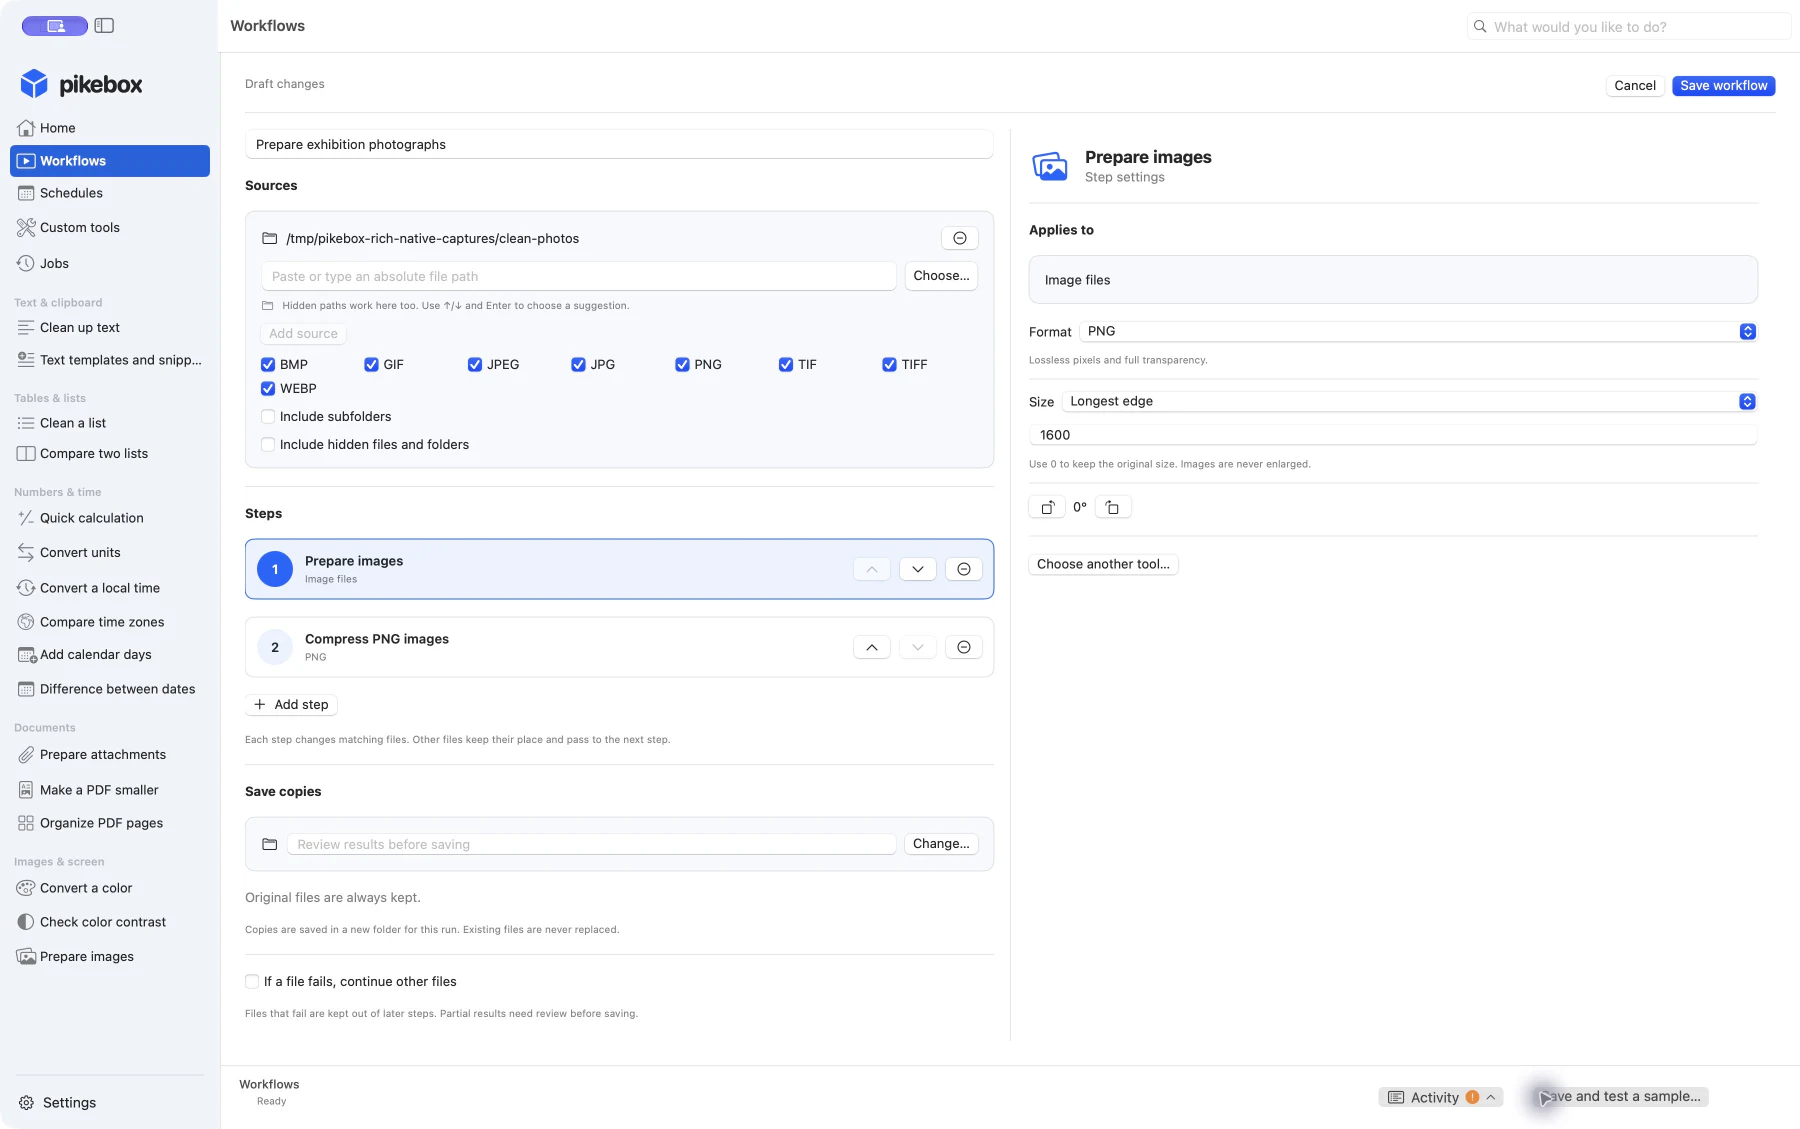
- Choose Add step and pick a tool from the list. Select the new row to open Step settings. For example, choose Prepare images and set the longest edge for smaller photos.
- Check Applies to. A step only acts on supported files. Other files pass through to the next step. Drag rows or use their arrows to reorder them. Use the minus button to remove a step or Choose another tool… to replace it.
- For Combine PDFs, add individual PDFs in the order you want them joined. For Split PDFs, choose One PDF per page or Page groups. Enter
3, 1; 2–4to make one copy with pages 3 and 1, and another with pages 2 through 4.
Example: prepare a photo folder
In Prepare exhibition photographs, the first step creates PNG copies with a longest edge of 1600 pixels. The second, Compress PNG images, optimizes those copies. Keep Review results before saving selected so you can inspect the output first.
Sample images; Mac interface shown in English.
Decide where copies go
- Under Save copies, leave Review results before saving in place to save checked copies later, or choose Change… to pick a separate destination folder. A successful full run writes copies in a new folder for that run.
- Turn on If a file fails, continue other files if you want other files to keep going after one fails. The failed file drops out of later steps. Check and save any usable partial results yourself.
- Choose Save workflow. To change it later, select it and use Edit workflow. Use Duplicate to make a variation, or Archive to hide it. Under Archived, choose Restore to bring it back.
Pikebox for Mac, shown in English.
Run and review a workflow
Test before a full run
- In the editor, use Save and test a sample… to save and prepare checked previews without saving output copies. Choose a small test source when you want to try just one or two files.
- To process your regular selection, save the intended sources, select the workflow and choose Run workflow. A folder run uses the files it checks at the start.
- If Pikebox can’t confirm whether the run started, use Check run before starting another. If it finds no run, choose Retry this request or Prepare a new run.
Check results and save copies
- Open Show run or Open in Jobs to see the run. Check whether each file changed, was kept unchanged, was saved or needs attention.
- Choose Review result beside an item to see its details. For a ready file, preview and save the copy you want. For a failed file, read the reason before trying again.
- After a run saves copies to a folder, use Show saved copies to open it. The original files stay where they were.
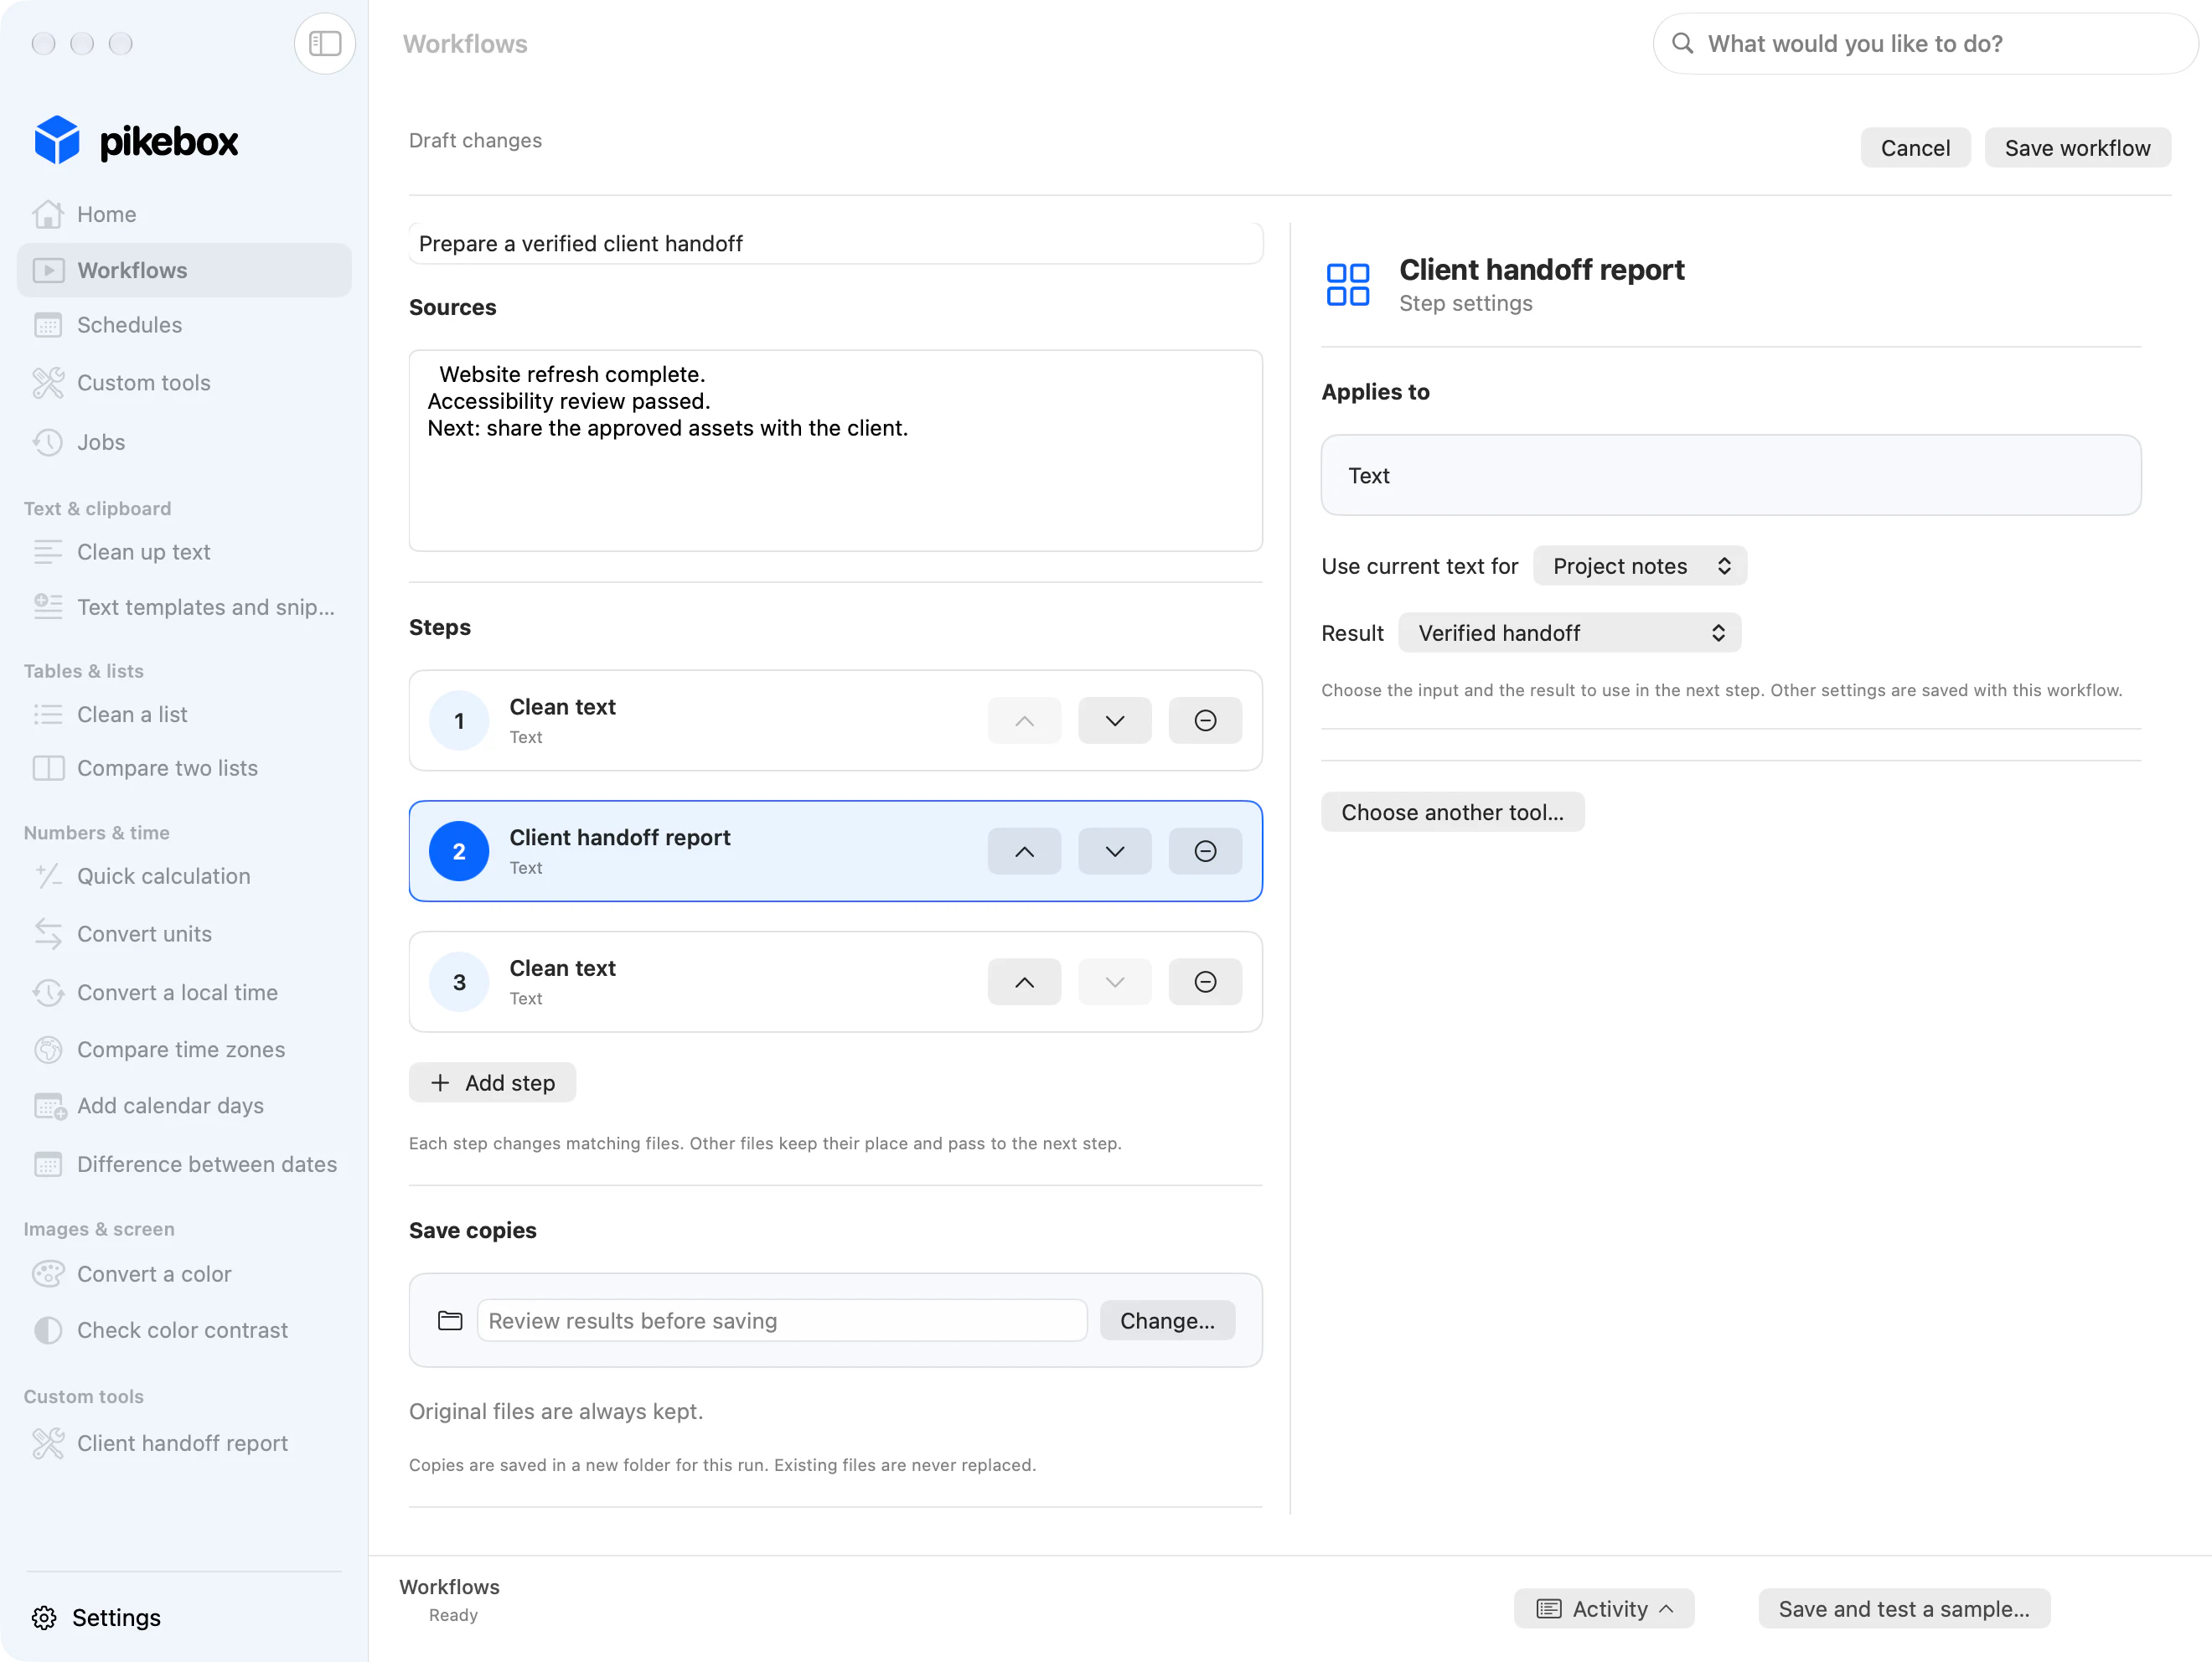
The example workflow Prepare a verified client handoff has three steps: Clean up text trims and collapses spaces, Client handoff report creates and checks the report, then Clean up text changes the selected Verified handoff to uppercase.
Sample notes and files; Mac interface shown in English.
Check the three steps in order in the workflow editor, then check in Jobs that the final verification text is uppercase. The custom tool’s separate Results view shows its Markdown file and original verification text.
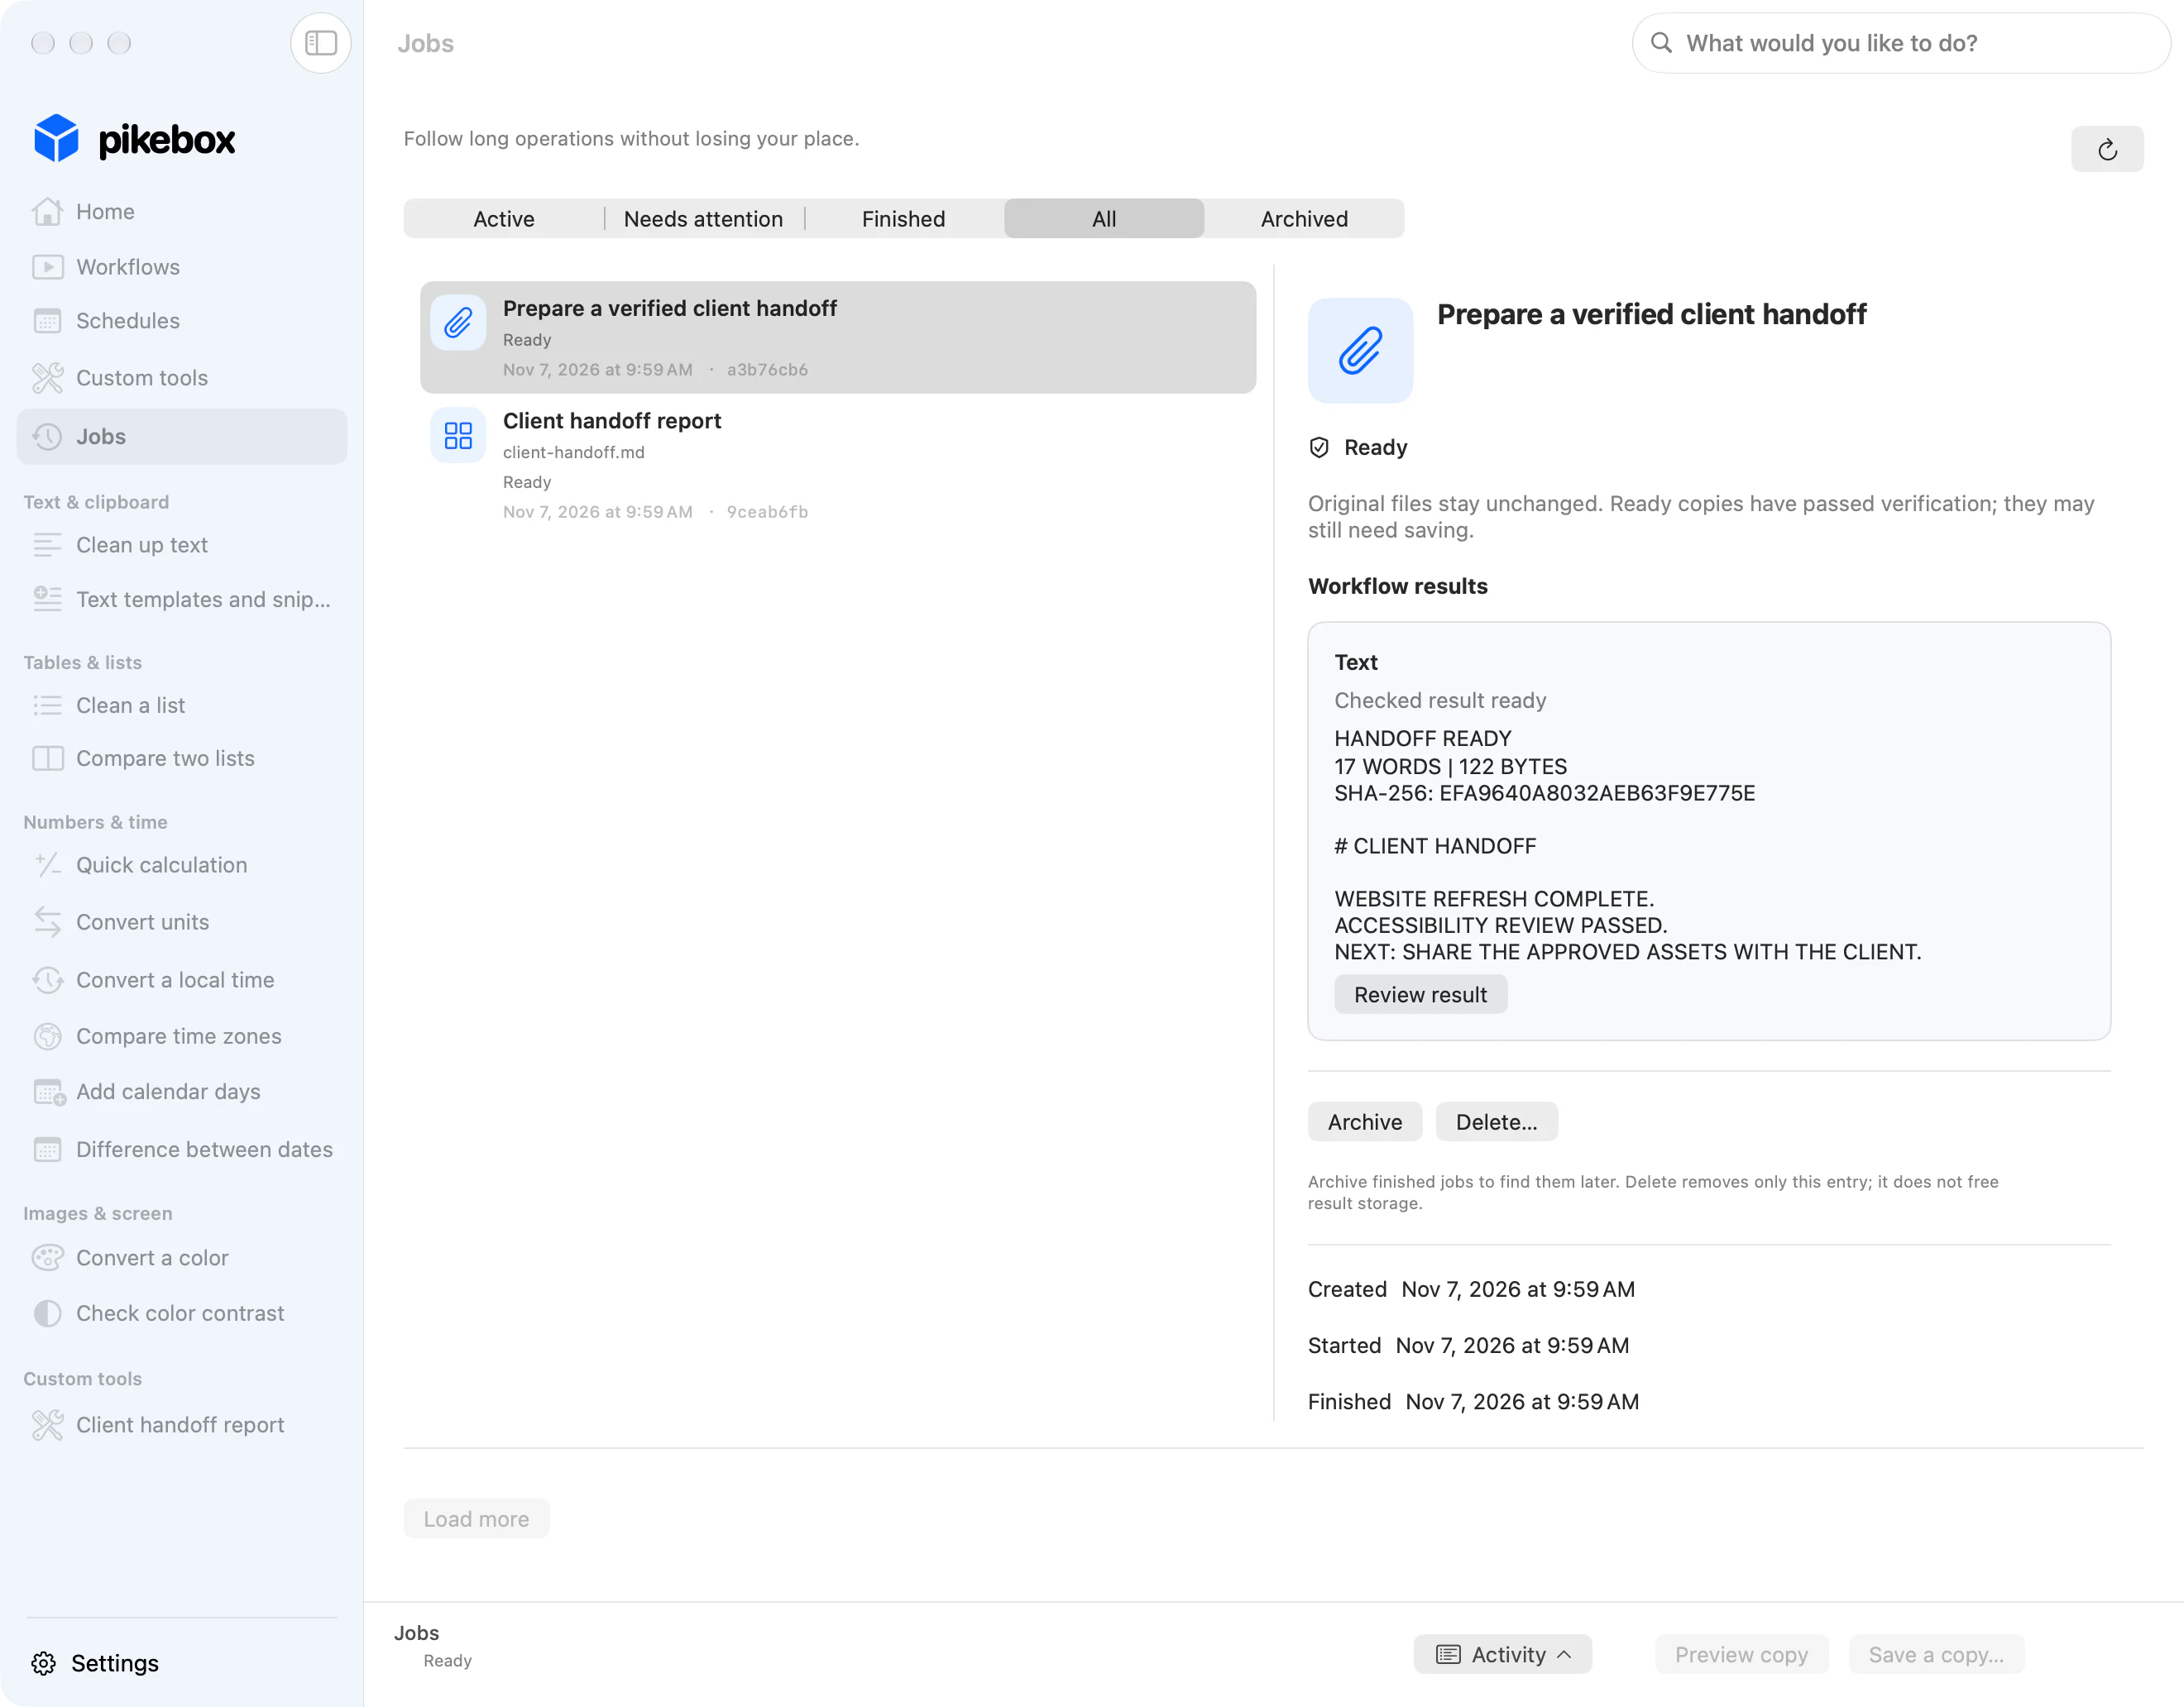
Sample notes and files; Mac interface shown in English.
Use custom tools and share definitions
Set up a custom tool
- Open Custom tools and choose New custom tool. Give it a name and description. Under Inputs, use Add input for each value you want to enter, such as text, a number, a choice or a file. Mark essential fields Required.
- Under Commands, choose Add command, name the command and use Choose application… to select the local program. Add the values it expects in order with Add argument. Each row can pass a fixed value or an input from the form.
- Use Show text output to display text results or Add output file to declare a file result and name it. If a command uses an earlier output, put it after the command that makes that output. Choose Save tool.
Review and test what will run
- Open the saved tool, choose its local applications if needed, then select Review applications and commands. Check each program, command and value being passed. Choose Enable reviewed tool only if you trust the program with your account’s file and network access.
- Choose Test with sample with disposable inputs. It runs every reviewed command and can have real effects. Check its results in Jobs. Review again if the application changes.
- To add the tool to a workflow, select it when offered in the step picker. Choose which input receives the current file or text and which result goes to the next step.
In this example, Client handoff report has two reviewed commands. The first turns the multiline Project notes input into client-handoff.md. The second reads that file and returns HANDOFF READY with a word count, byte count and checksum.
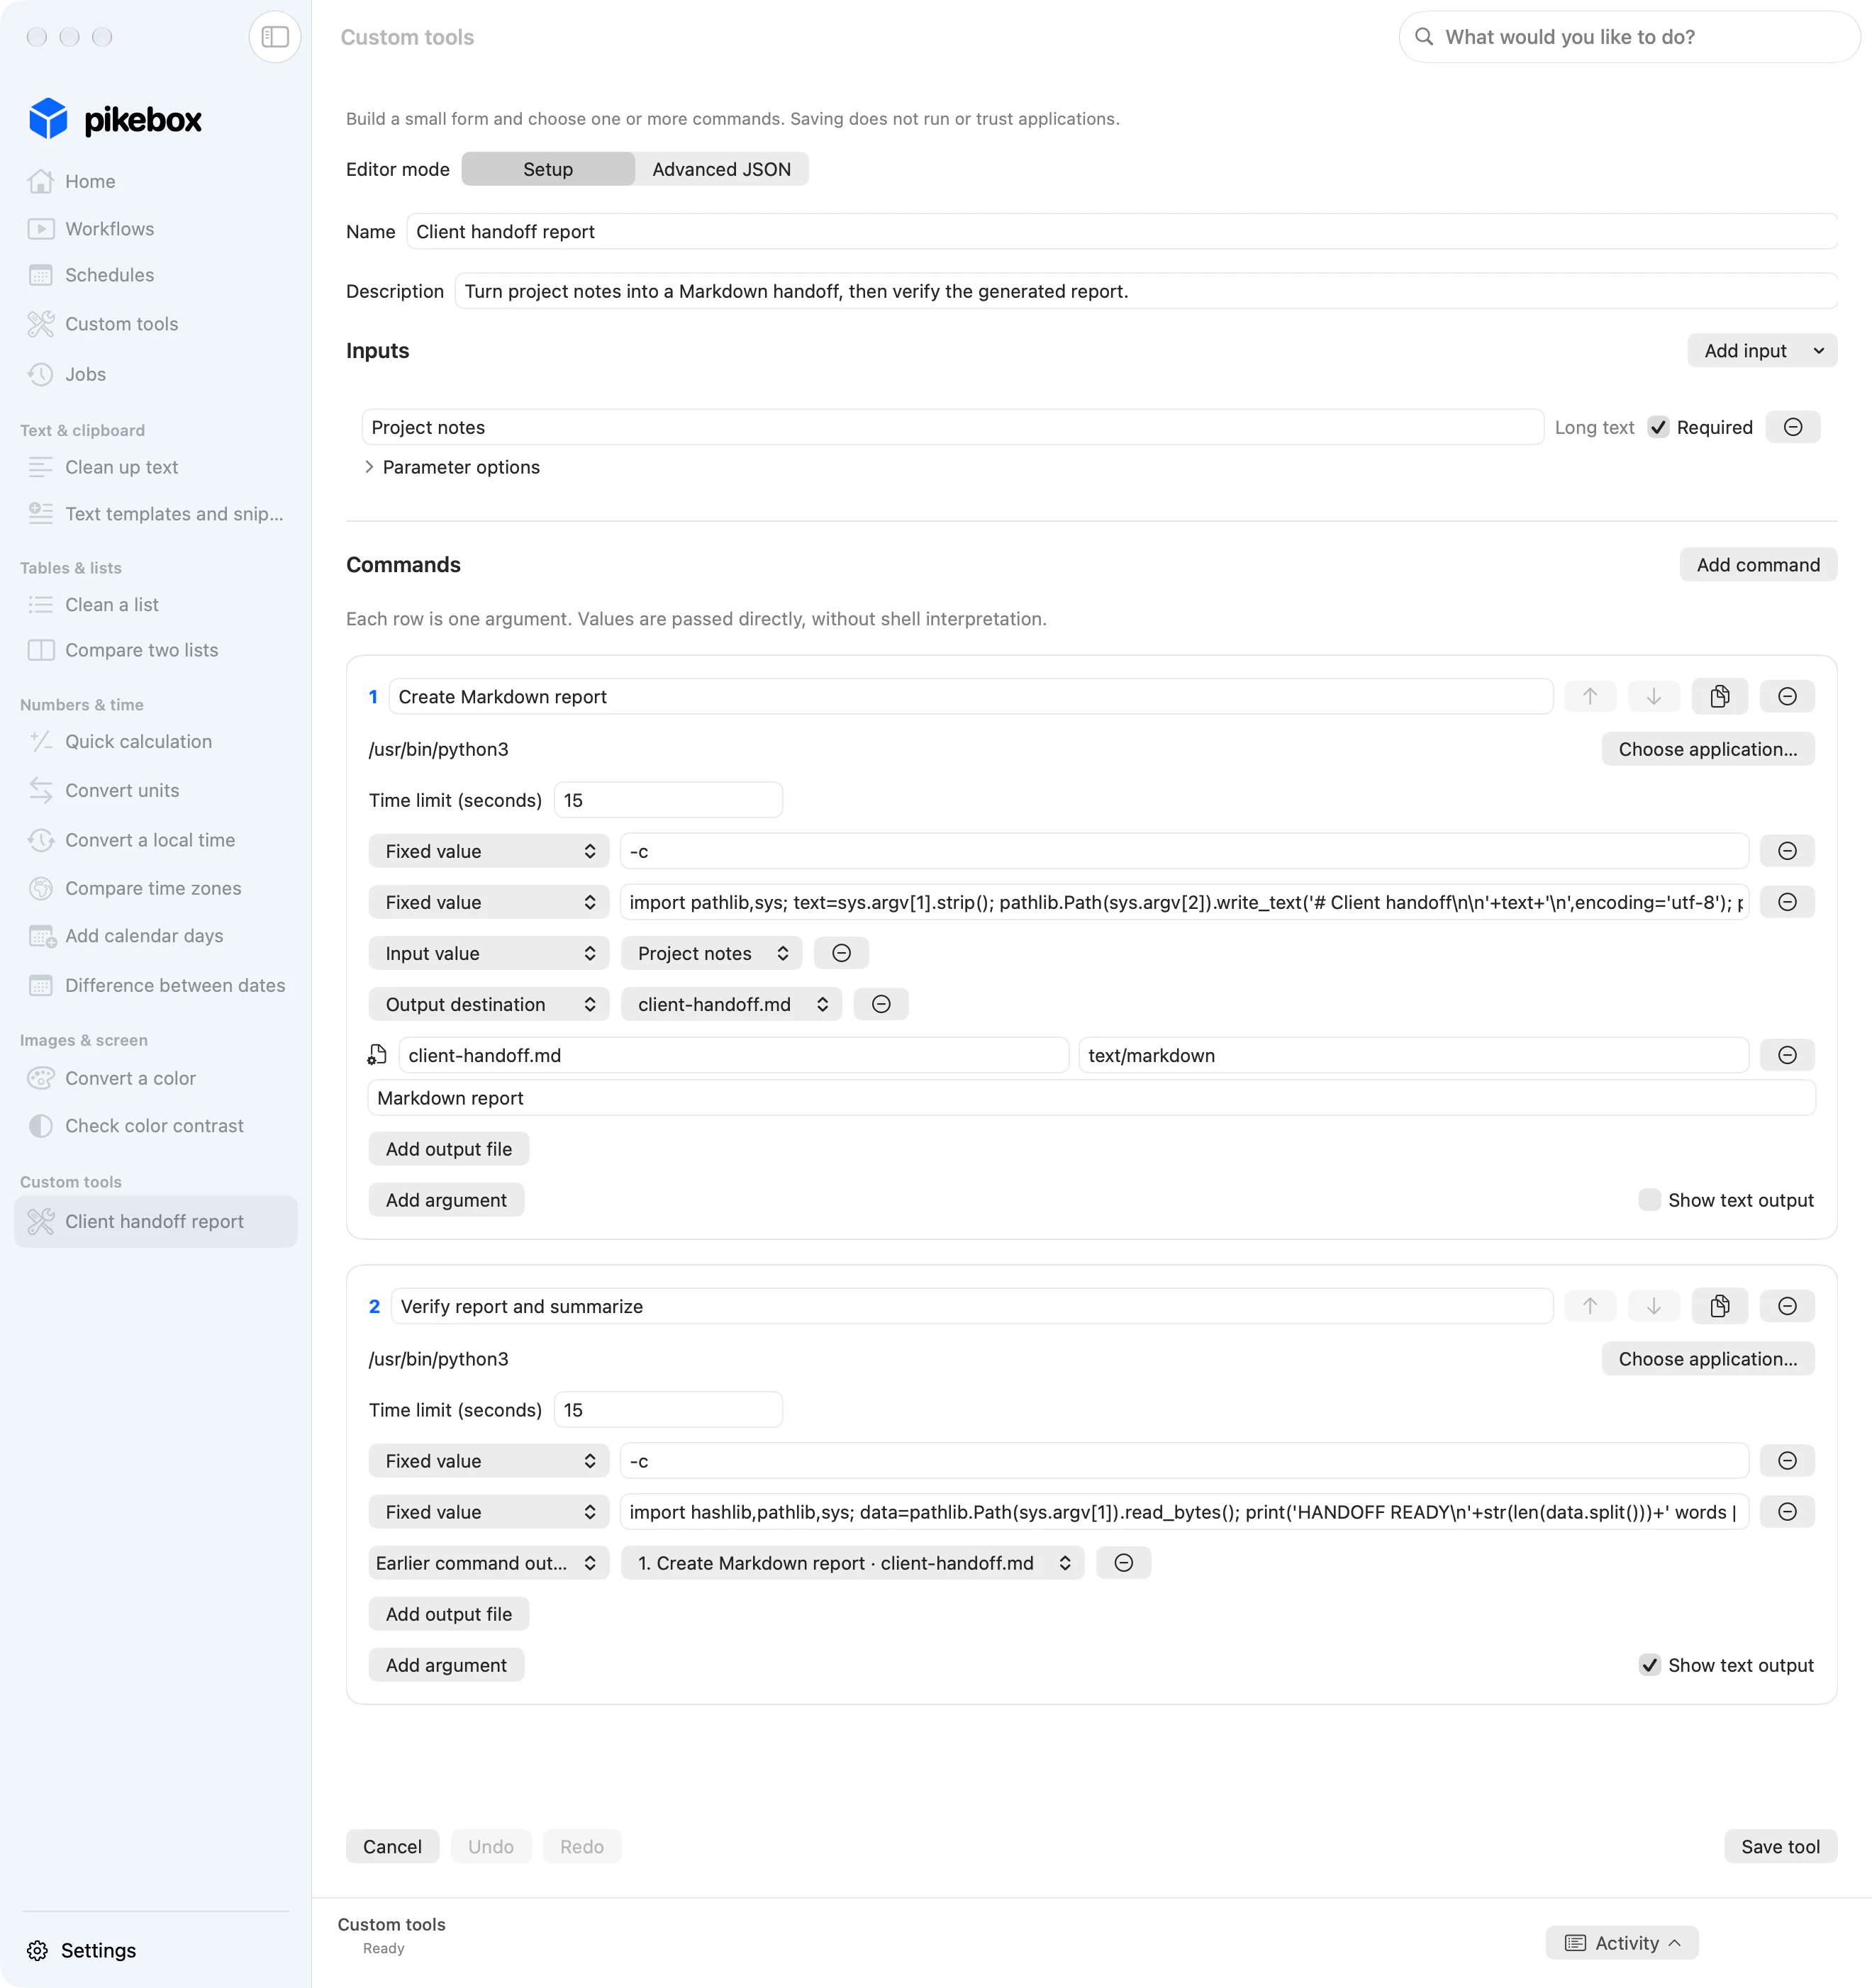
Sample notes and files; Mac interface shown in English.
Check both results in the custom tool’s Results view: use Save a copy… to save and inspect the Markdown file, then read the verification text. This shows how one command can use a file made by an earlier command.
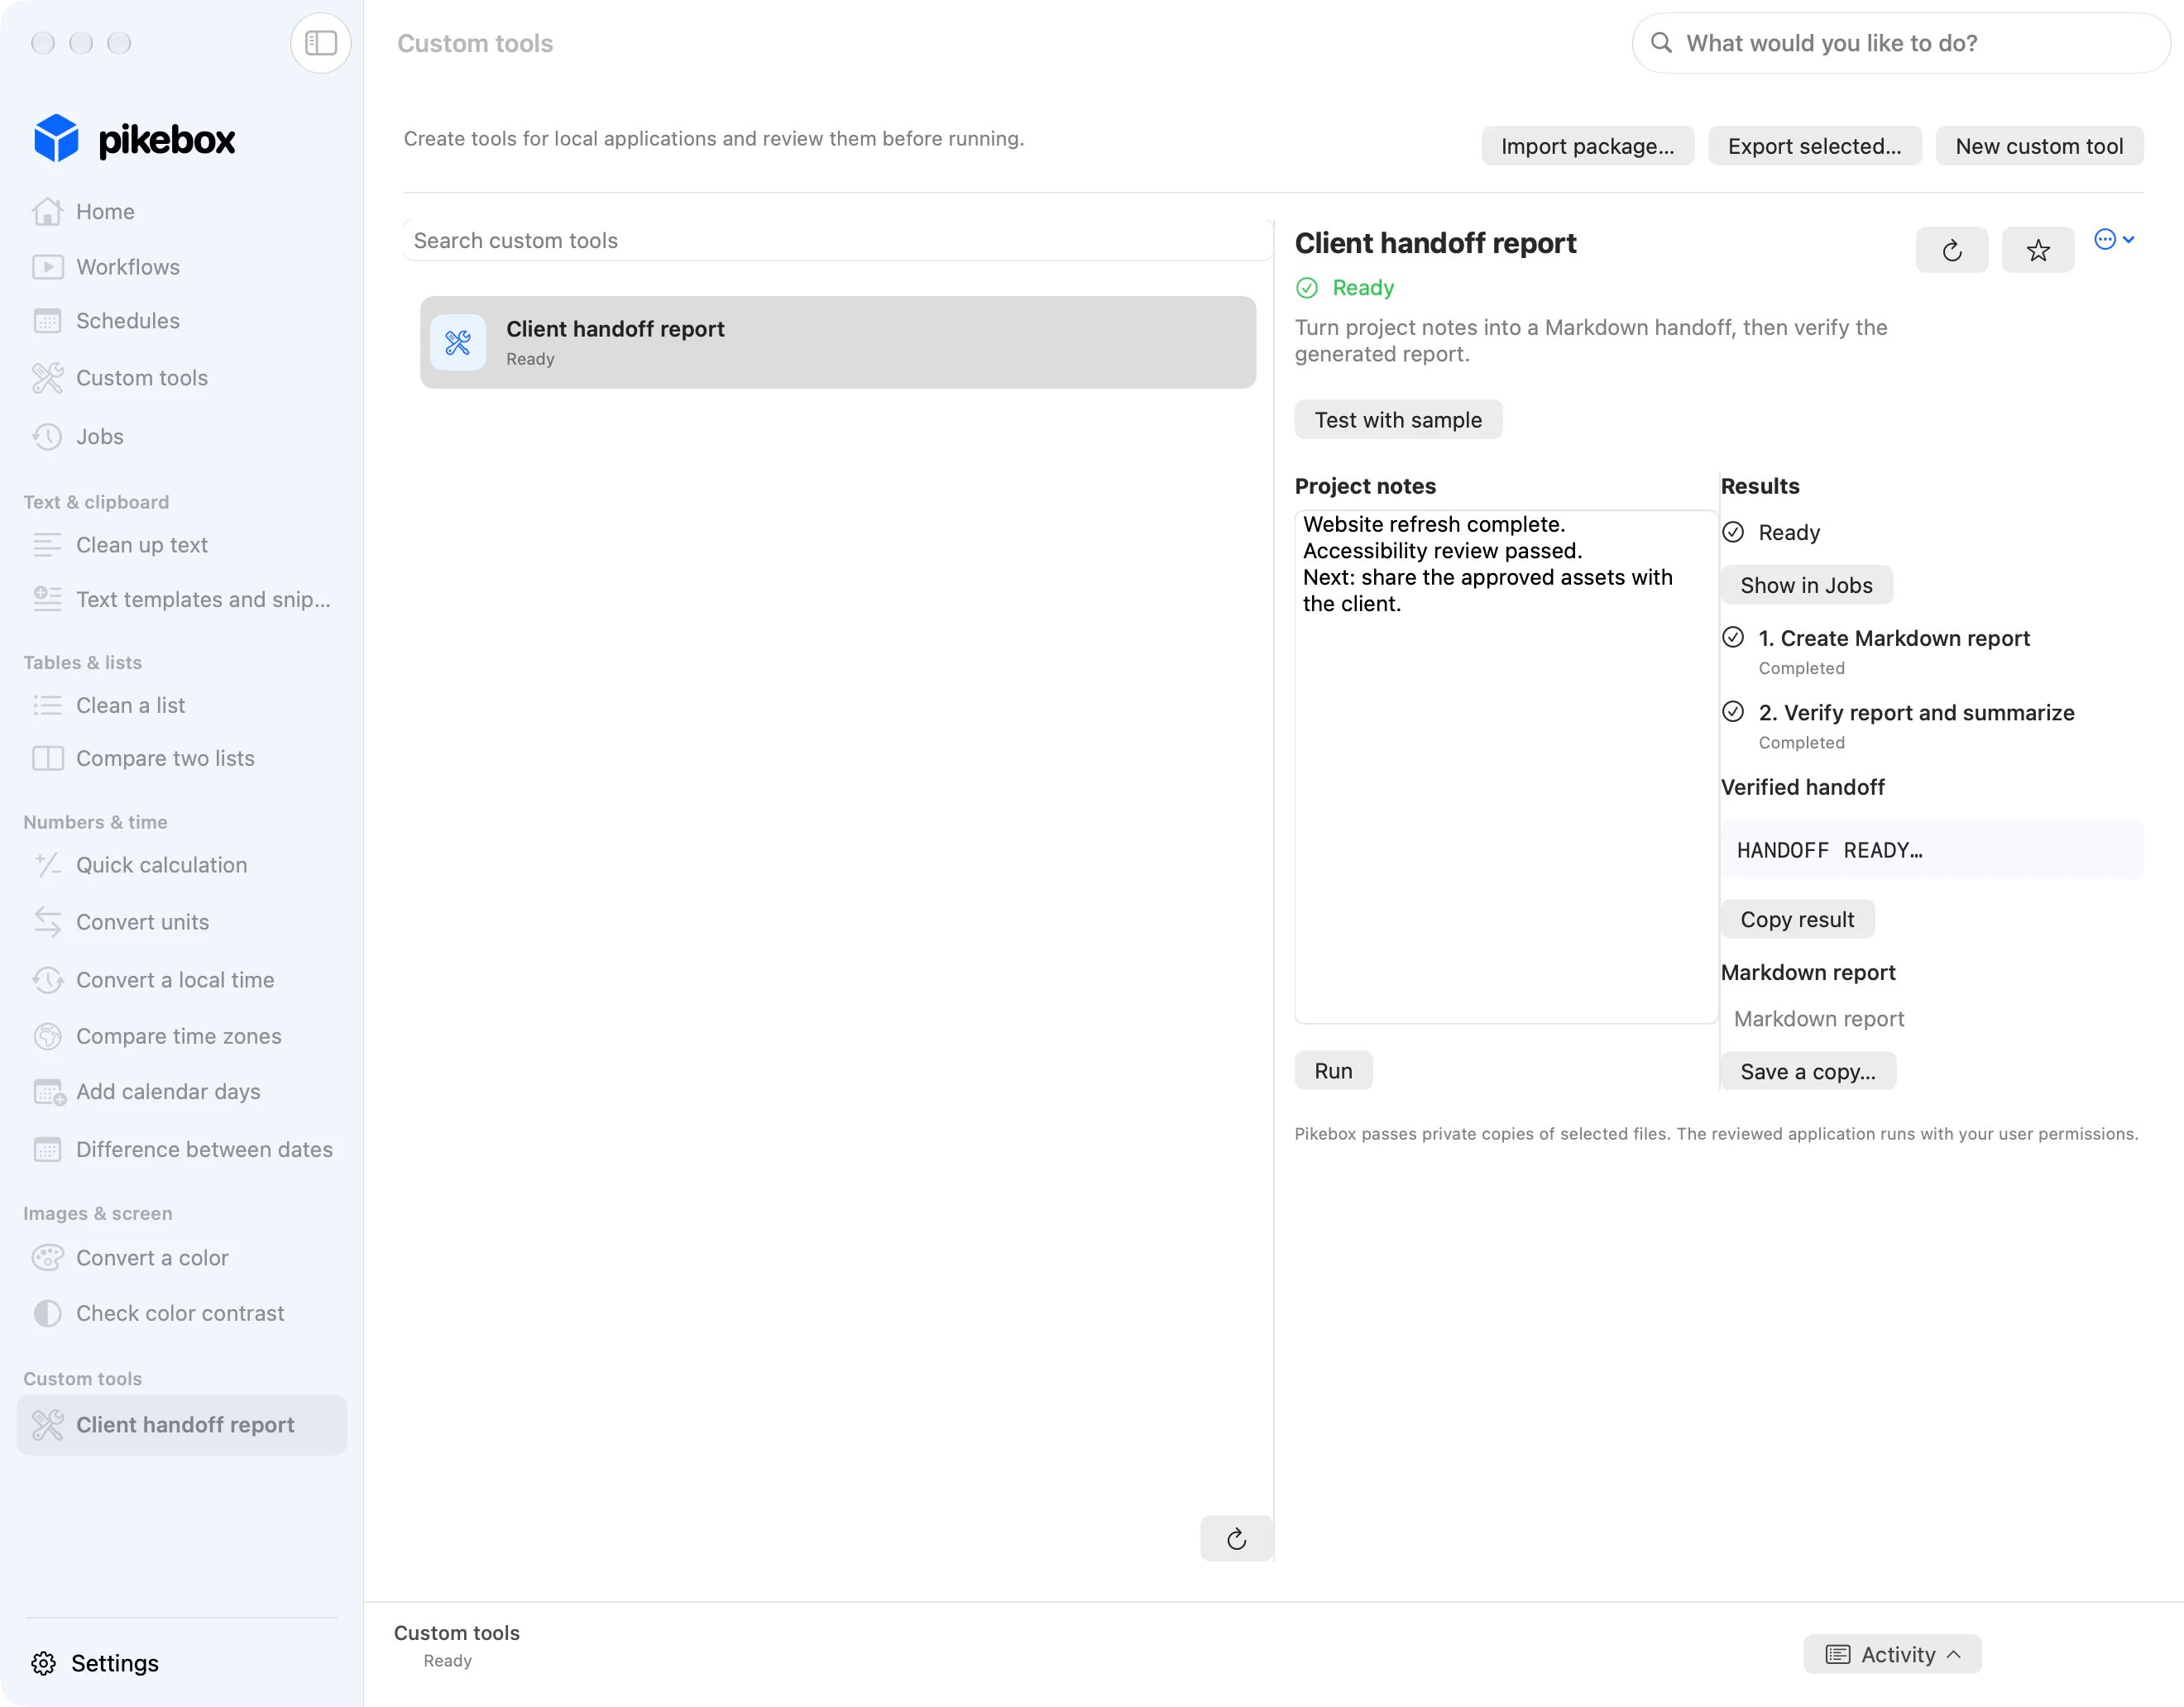
Sample notes and files; Mac interface shown in English.
Move definitions to another Mac
- Select items and choose Export selected…. Review the workflow, custom tool or schedule and any saved text or values before sharing.
- On the other Mac choose Import package…, check the selection, then choose local files, folders or applications again as needed. Review and enable imported schedules when you’re ready.
Schedule a run
Choose when it should run
- Open Schedules and choose New schedule. Enter a name. Under Run, select the exact saved tool or workflow and fill in Saved inputs if shown.
- Choose Once and enter a date and time, Daily or Weekdays for a regular time, or Custom to tick days and use Add time for more times.
- Set Time zone and Starts, then check Next three runs. The named zone stays the same when you travel. For a one-time run at a repeated clock time, choose the earlier or later occurrence. Repeating schedules use the earlier occurrence and skip times the clocks jump over. If a one-time run falls at a time the clocks skip, move it to a valid time before or after the change.
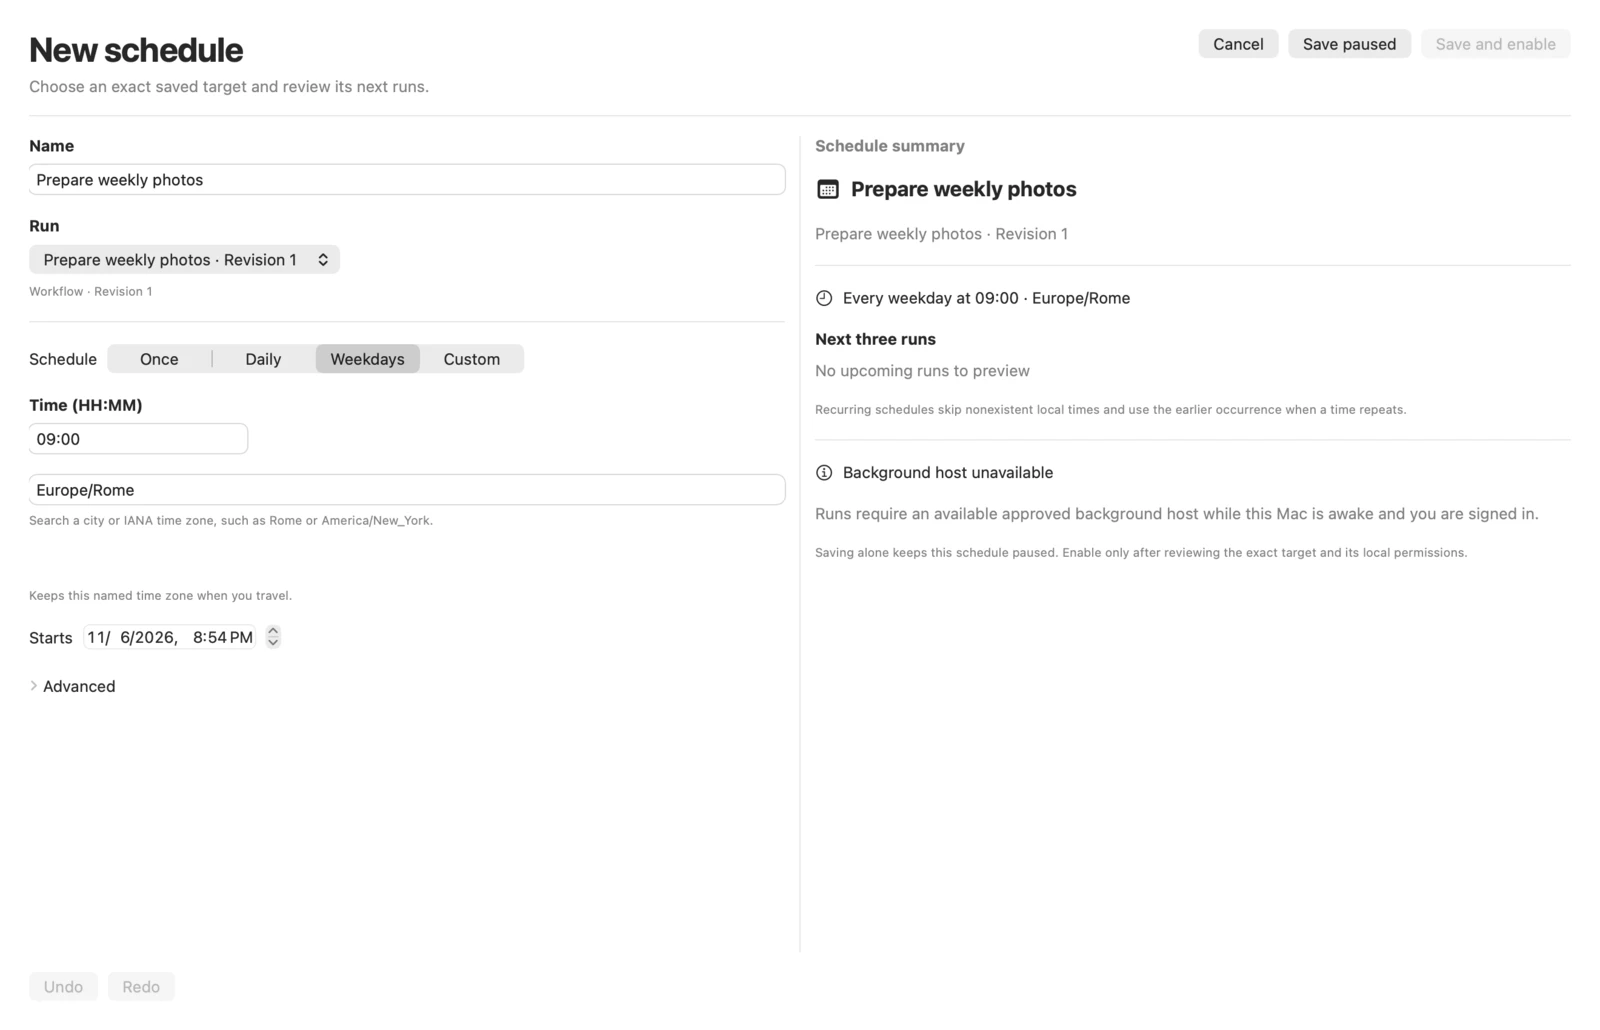
This example is set for weekdays at 09:00 in Rome. Set up background jobs before enabling the schedule. Pikebox for Mac, shown in English.
Set the missed and overlapping run rules
- Open Advanced. Under If missed, set the time limit for catching up with the latest missed run to 1 hour, 24 hours or 7 days. Older missed runs expire.
- Under If still running, skip the new run or keep only the latest one waiting. Runs can use battery power. Choose which completion notifications you want and check macOS notification permission.
Review access, enable and pause
- Choose Save paused to keep a draft, or Save and enable to proceed to the review. Select a paused schedule and use Enable schedule to review it later.
- Verify the selected revision and saved values. For a workflow, choose the files or folders it can read, check subfolders and reusable text if applicable, and use Keep results in Pikebox or select a save folder with Choose folder…. Review any additional local access Pikebox requests, then choose Enable schedule.
- If you edit the workflow or change what the schedule can access, review it again. Choose Pause schedule to stop future runs. For a current or earlier run, use View job under Last run or Run history.
The example one-time schedule runs Prepare a verified client handoff with saved project notes. After the scheduled time, choose View job under Last run.
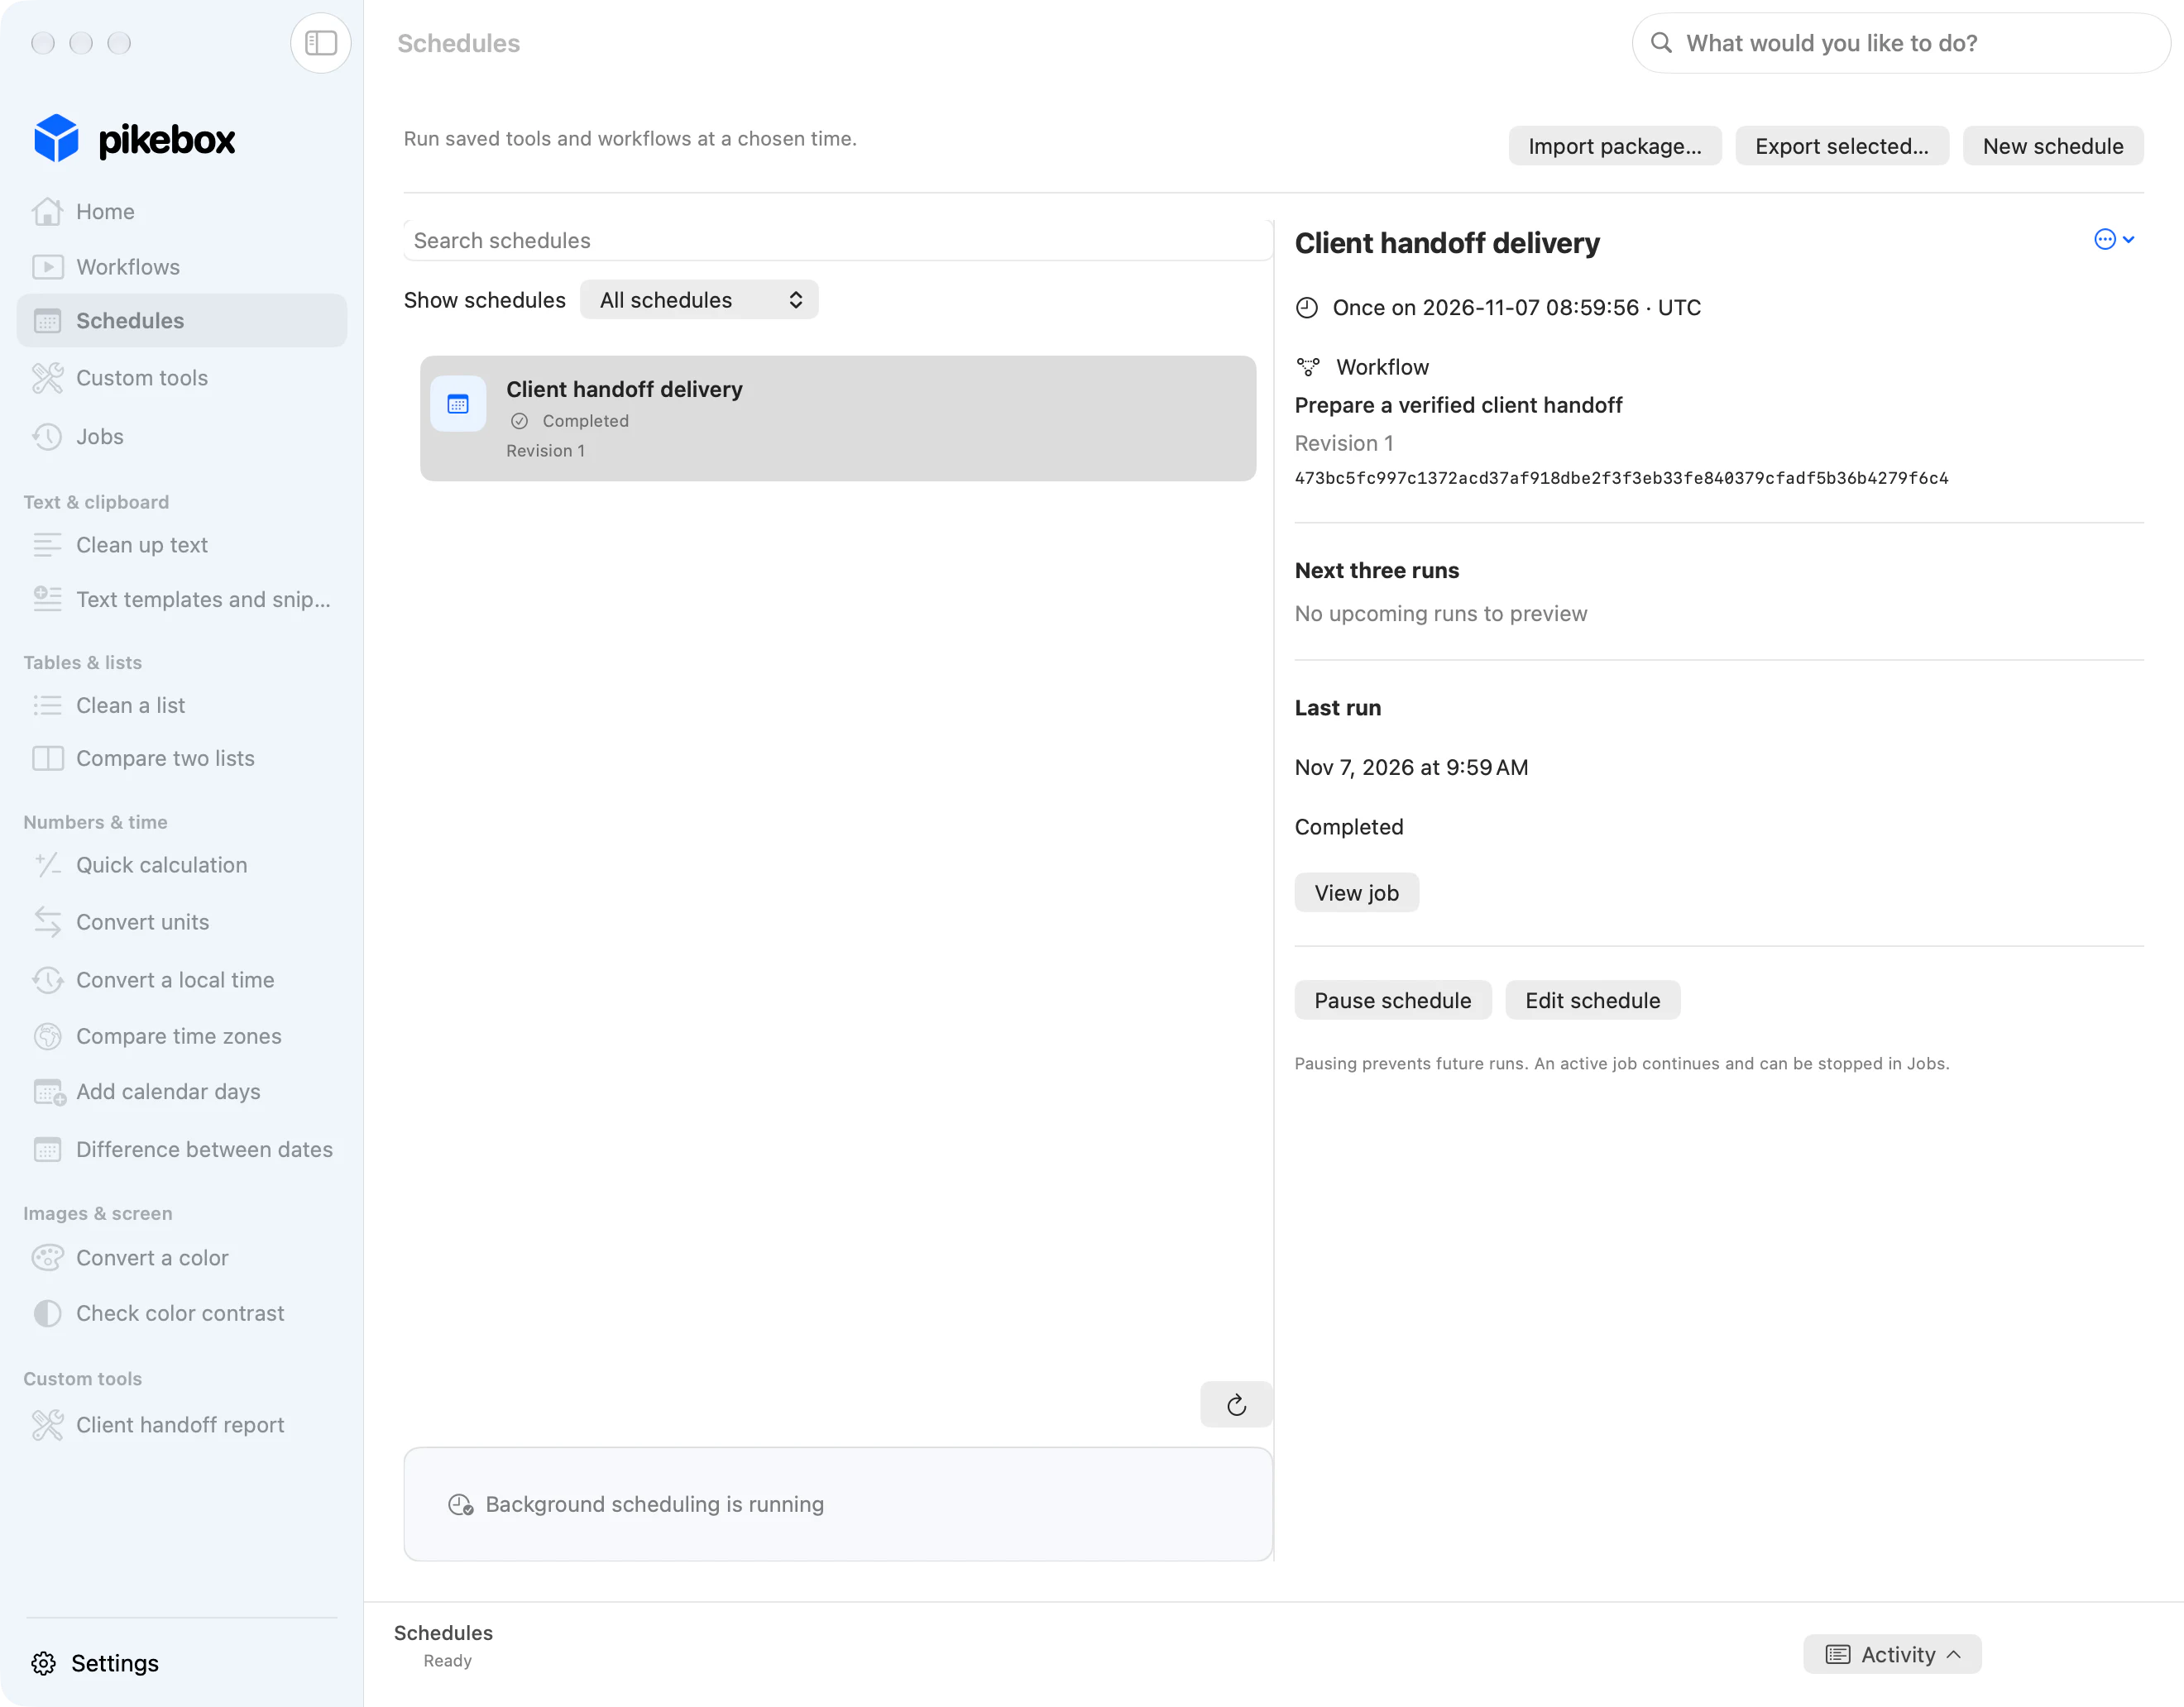
Sample notes and files; Mac interface shown in English.
In Jobs, check that the origin identifies the schedule, then inspect the final uppercase verification text. The last run and linked job let you check the result of that scheduled run.
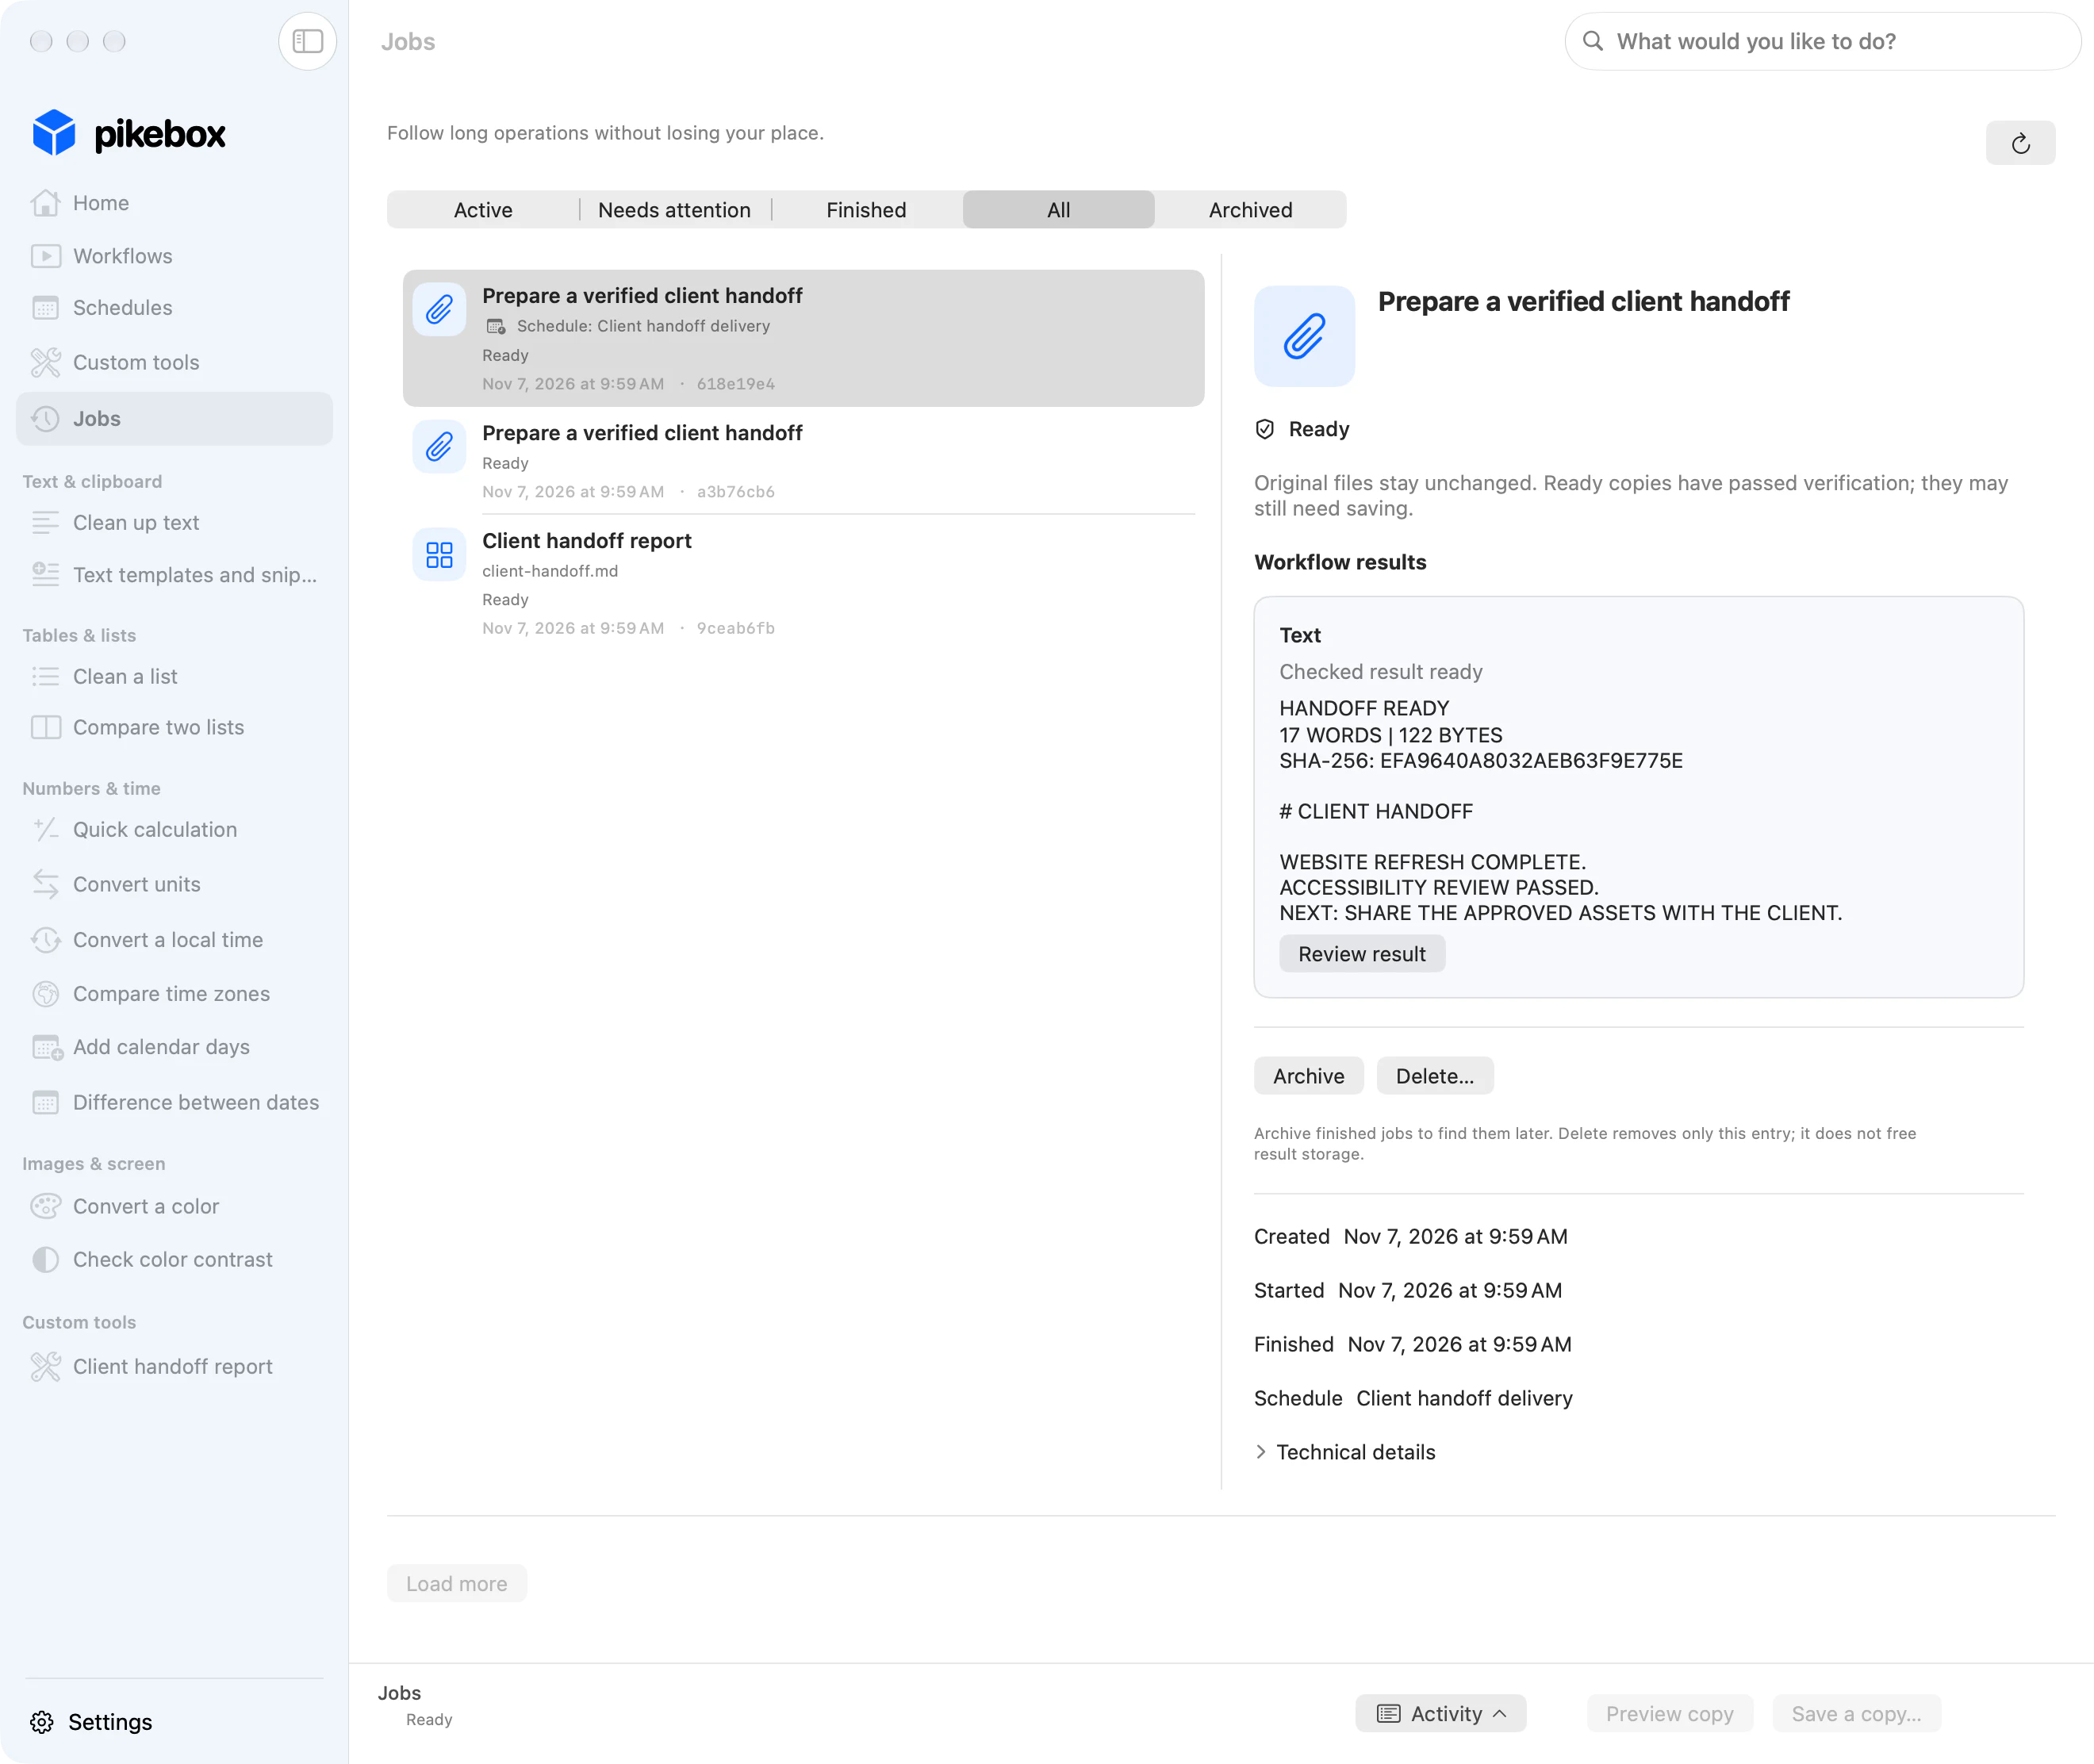
Sample notes and files; Mac interface shown in English.
Keep work running in the background
- In Settings, open Background jobs. If this build offers Run in background, turn it on. If prompted, allow Pikebox in System Settings → General → Login Items & Extensions.
- Return to Pikebox and use Check or Reconnect when shown. Keep the Mac awake and stay signed in when schedules need to run.
- If the connection drops, check Jobs before repeating a task.
Check background availability
Keep your Mac awake and signed in. Pikebox does not wake a sleeping Mac. Check Background jobs before relying on a schedule after leaving the app.
If Settings says this version runs tools only while Pikebox is open, keep the app open; that build does not offer background scheduling. Use Check to refresh the status. In a build with background support, follow the displayed registration, System Settings, or reconnect instructions. Do not assume a schedule is ready just because its time has been saved.
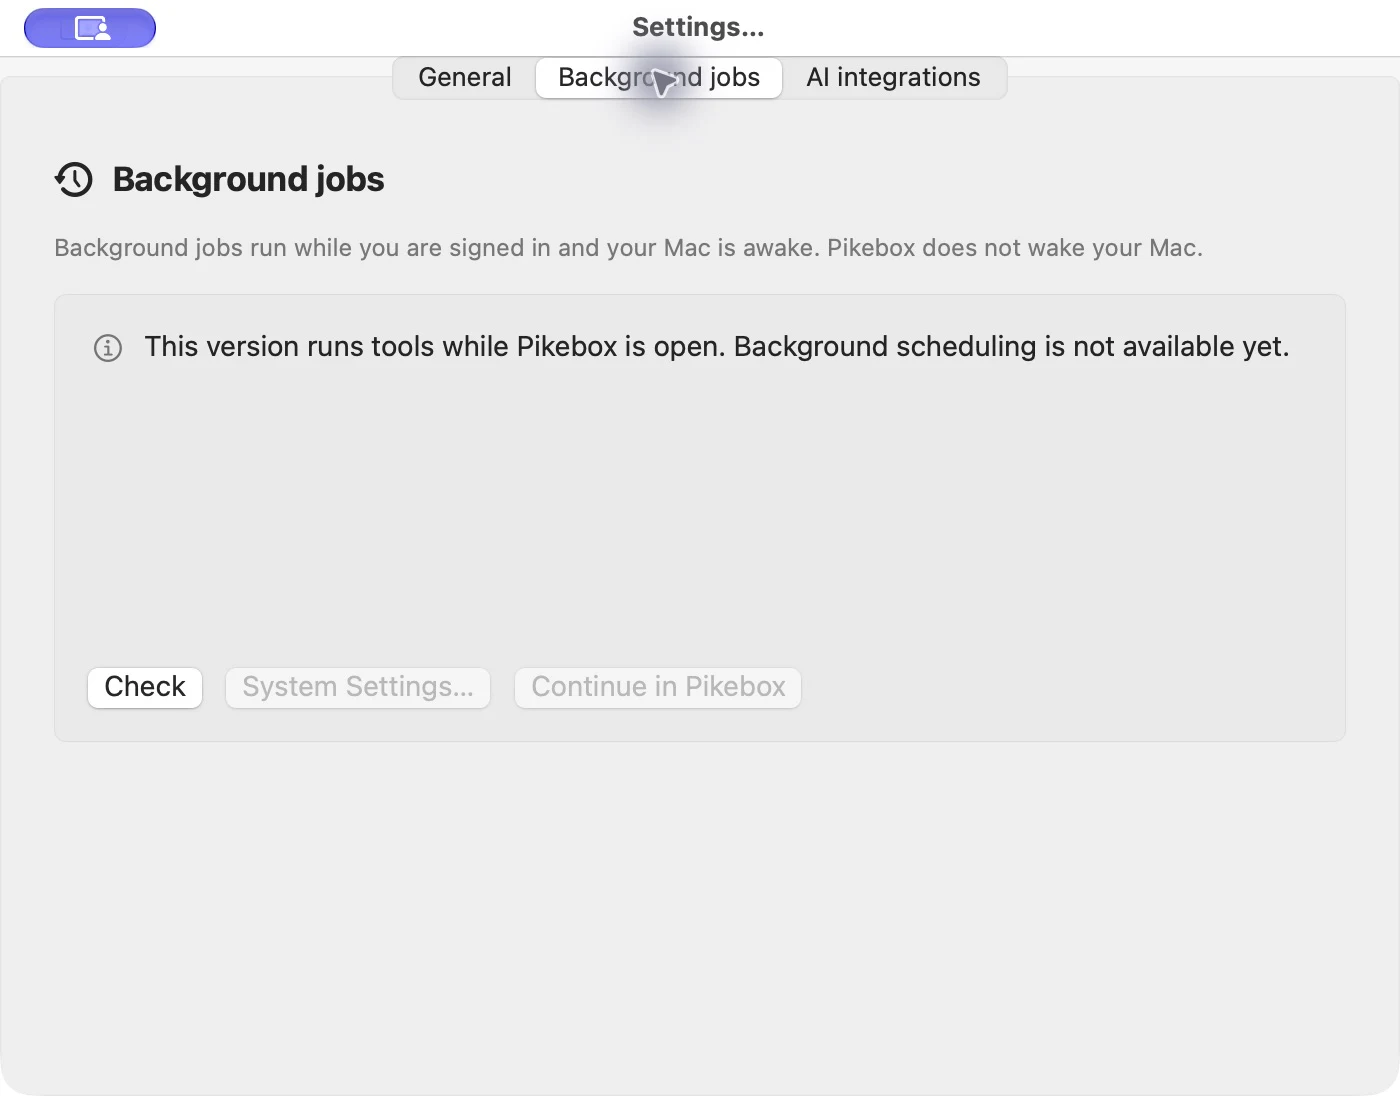
Foreground-only capture build, shown in English. This image does not show an enabled background service.
While a long operation runs, use other tools and return to Jobs to check its result. Pause a schedule to stop future runs; use Stop job on a running operation when you want to stop the current work. Check the original job before repeating an uncertain operation.
Review Jobs
After running the example photo workflow, open it in Jobs. All four files have checked copies. Expand Steps for this file to see the source check and both processing steps. Use Open this step to inspect a particular result.
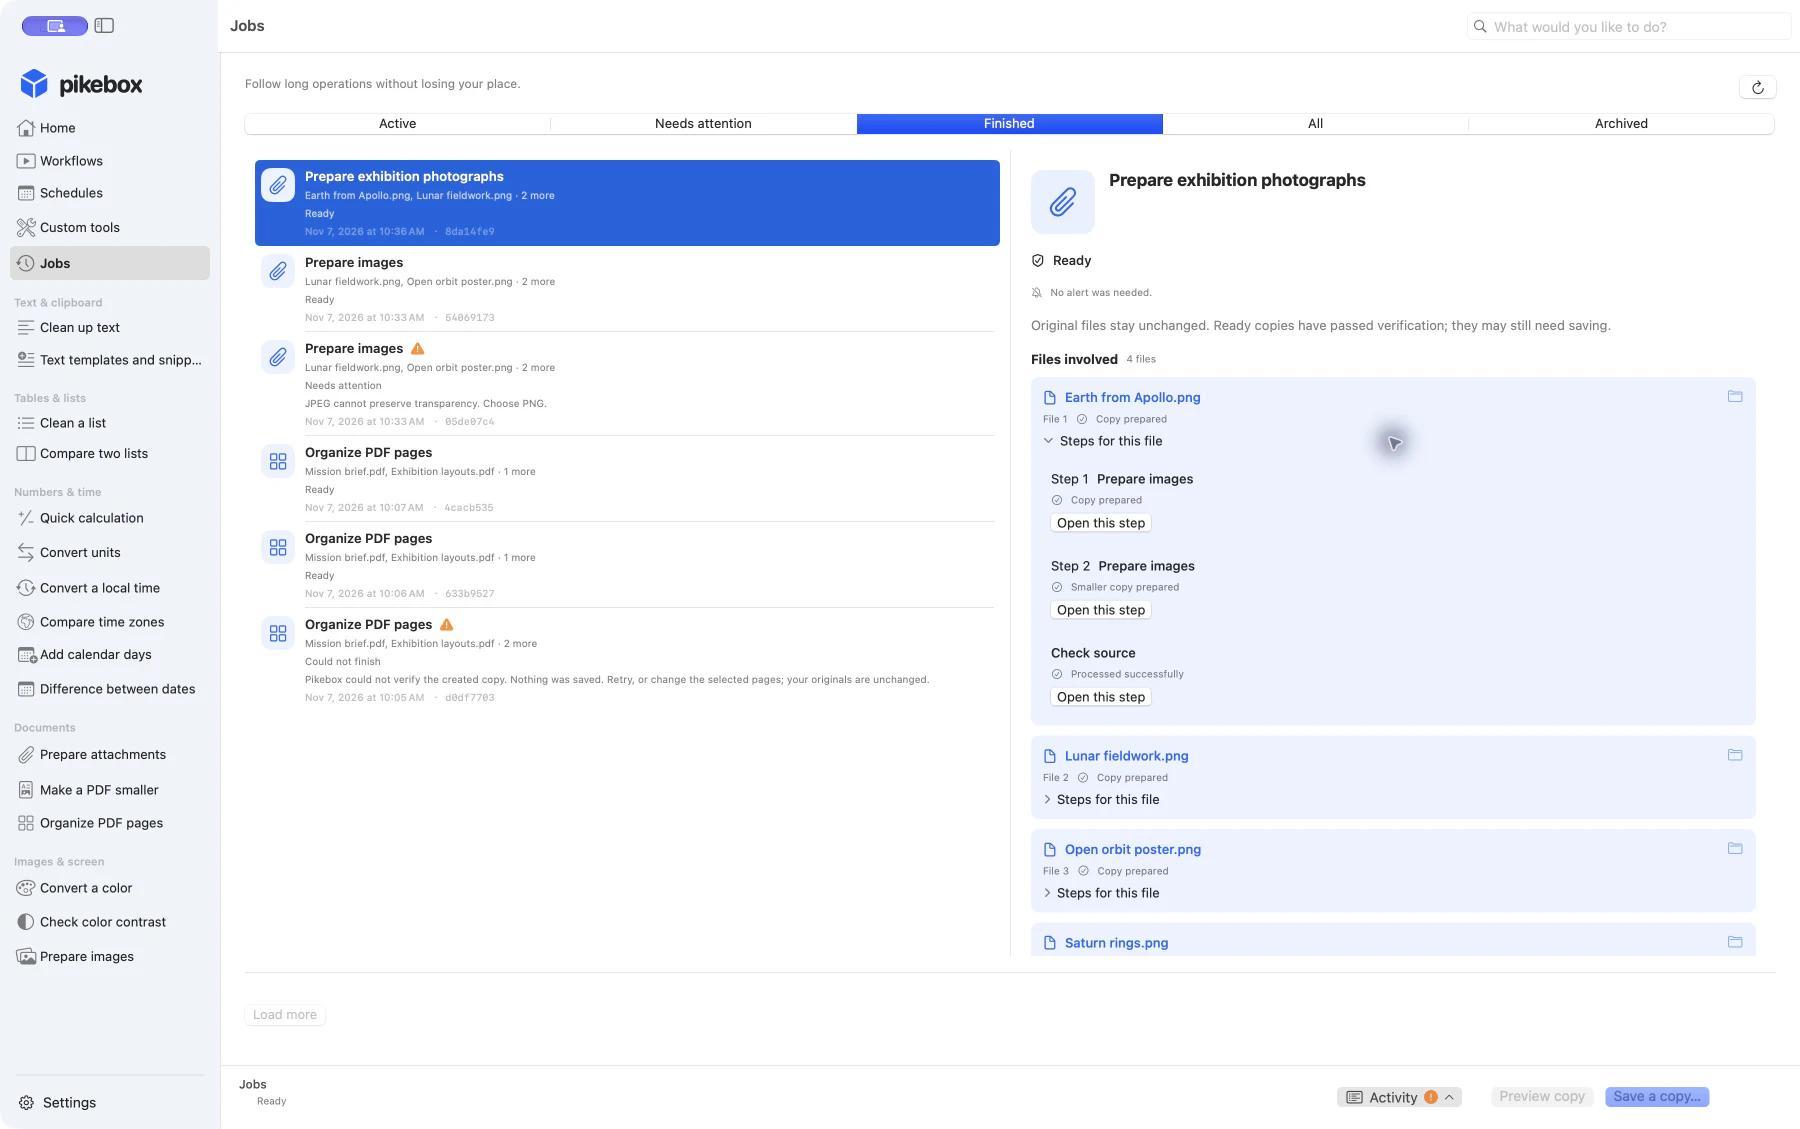
Sample images; Mac interface shown in English.
Open Jobs to see long tasks while you use other tools. Choose Active, Needs attention, Finished, All, or Archived to narrow the list. Select an entry and use the refresh button if you need the latest status.
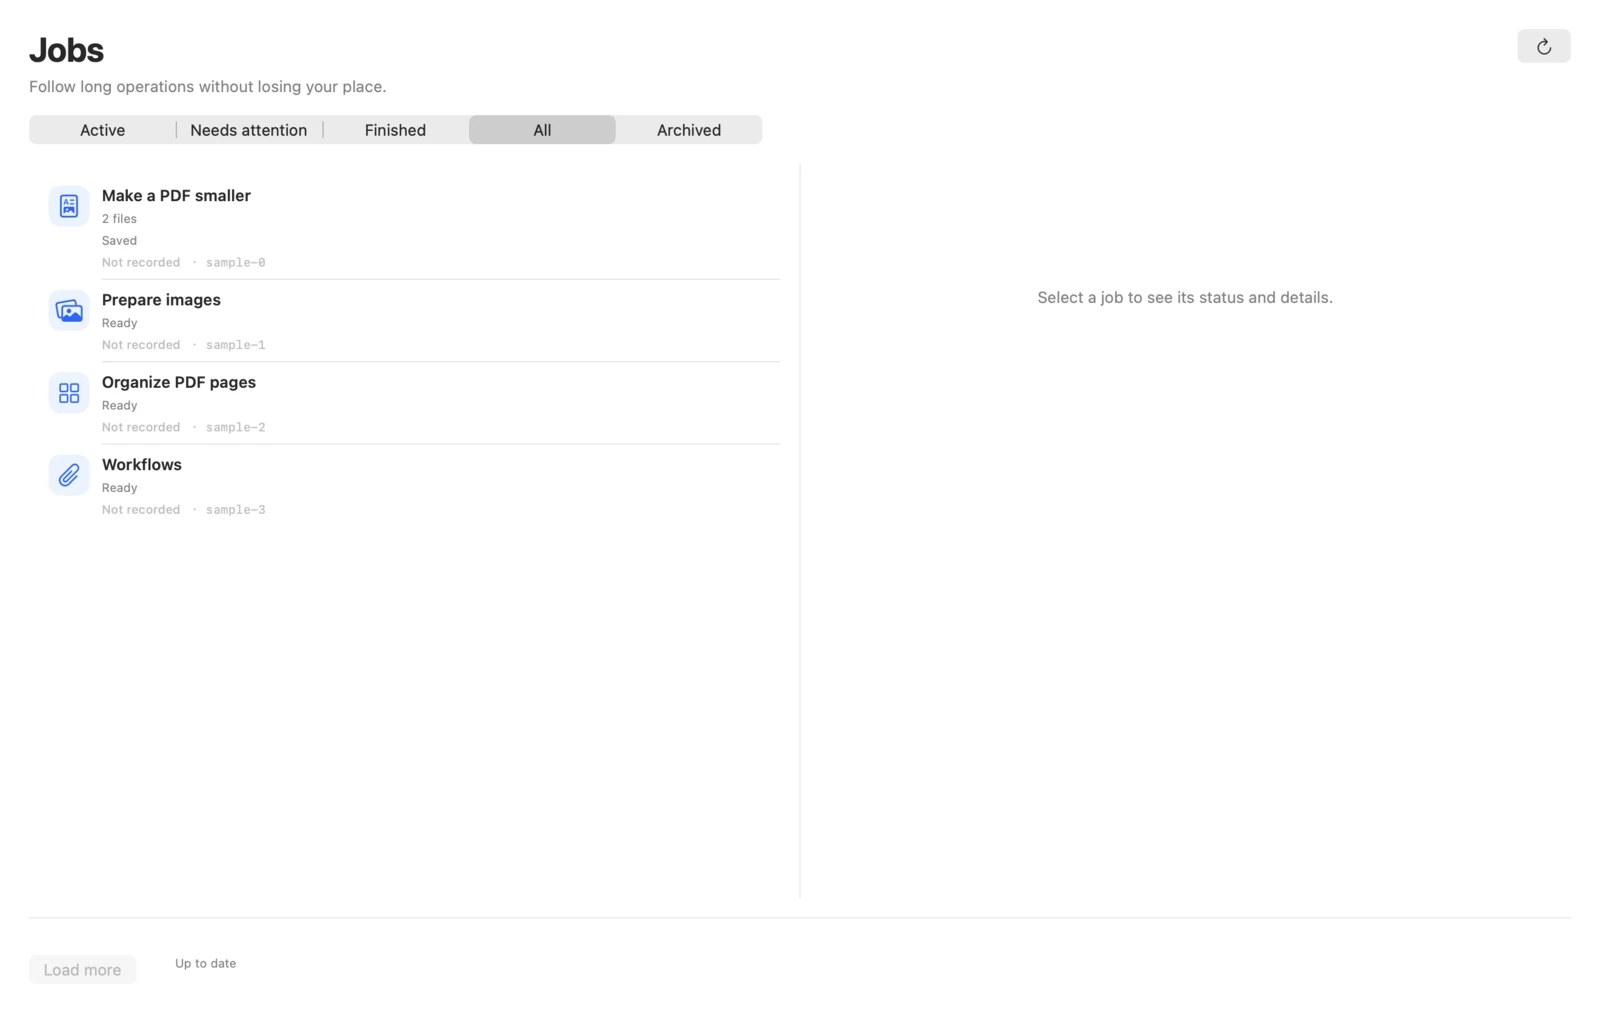
Pikebox for Mac, shown in English.
Inspect files and results
- Check the status and any message at the top. Scroll to Files involved to see the inputs and results. Expand Steps for this file on a file to see which steps finished. Use Open this step if you need the job for an individual step.
- Choose Preview copy to inspect a checked copy, or Save a copy… and select a destination. Use Show saved copy in Finder to find a copy you already saved.
Archive, restore or delete an entry
Choose Archive on a finished job to move it out of the main list. Use Archived and Restore to bring it back. Delete… removes the entry from Jobs and keeps the originals and saved copies.
Stop or recover a job
- Choose Stop job on a running job and wait for the final status. Inspect completed steps and copies before restarting. If it ran a custom command, check what that command changed before repeating it.
- If the save is uncertain, choose Check save to check the same save request. Check for an existing copy before trying to save it again.
- If the result is no longer available, use Open tool where offered, then select the original input again to start a new job.
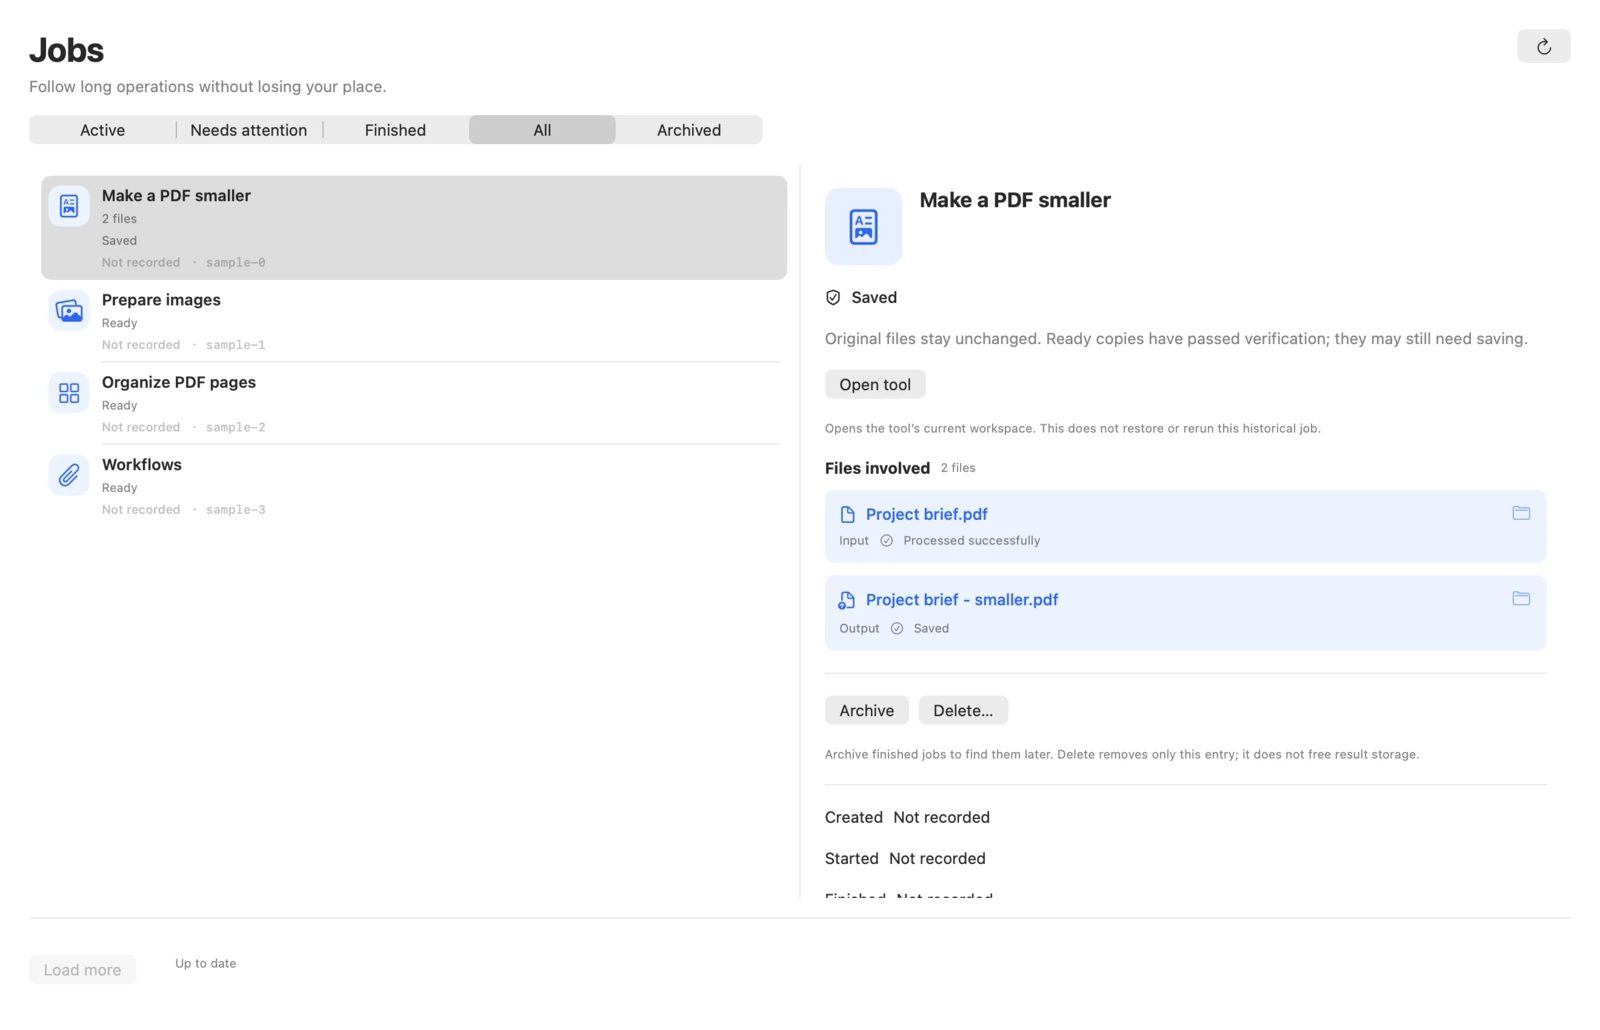
Pikebox for Mac, shown in English.