

PDFs and documents
Make PDFs smaller, arrange pages into a new PDF, and fit attachments under a shared size limit.
Make a PDF smaller
- Open Make a PDF smaller and click Choose… to pick a PDF. You can also drag a PDF into the tool.
- Start with Lossless (recommended) under Compression.
- Click Make a smaller copy. Wait while Pikebox checks the copy.
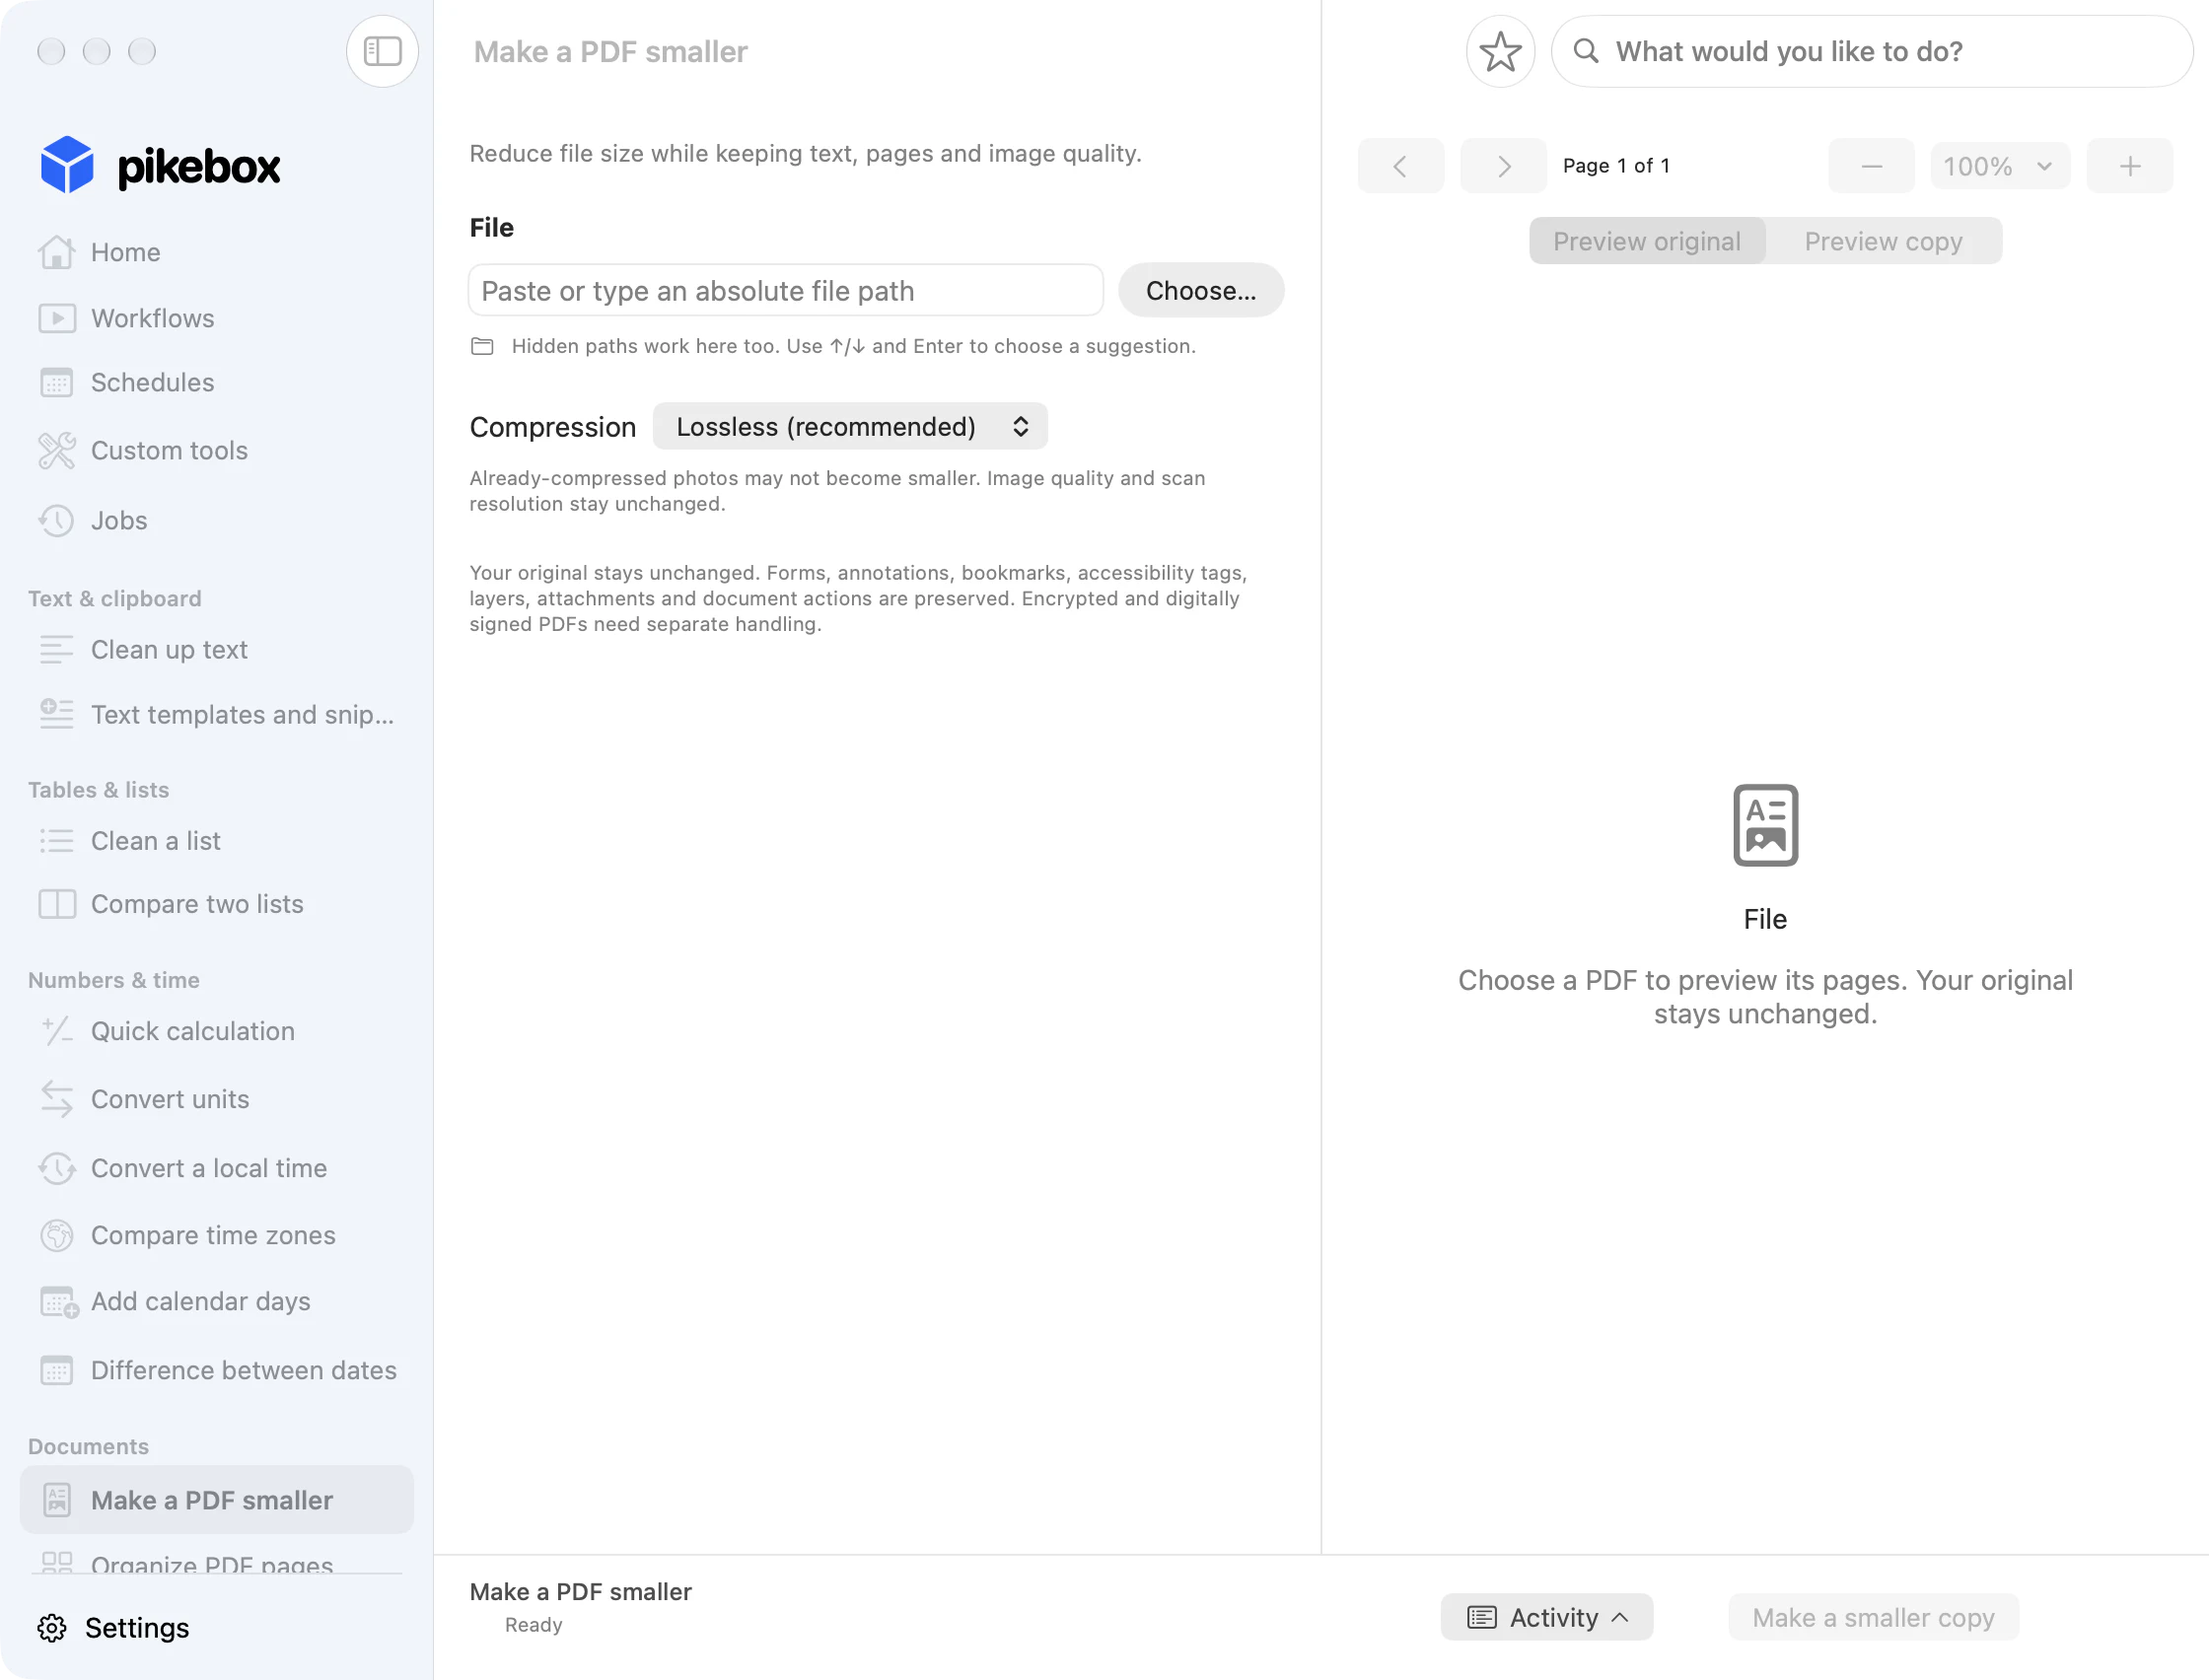
Pikebox for Mac, shown in English.
Choose a compression mode
- Lossless (recommended) reduces file size when possible while keeping image quality and scan resolution. It is the first choice for most documents.
- Structure only reduces overhead in how the PDF is stored. Try it when you want to leave the existing image data alone.
- Smaller copy (lossy) can save more space by recompressing supported JPEG images in the PDF. Under JPEG quality, try 80 to keep more detail or 70 for a smaller result. Image resolution caps the longest image edge without enlarging small images. It does not set a print resolution. Scanned text can lose detail even when selectable PDF text remains intact.
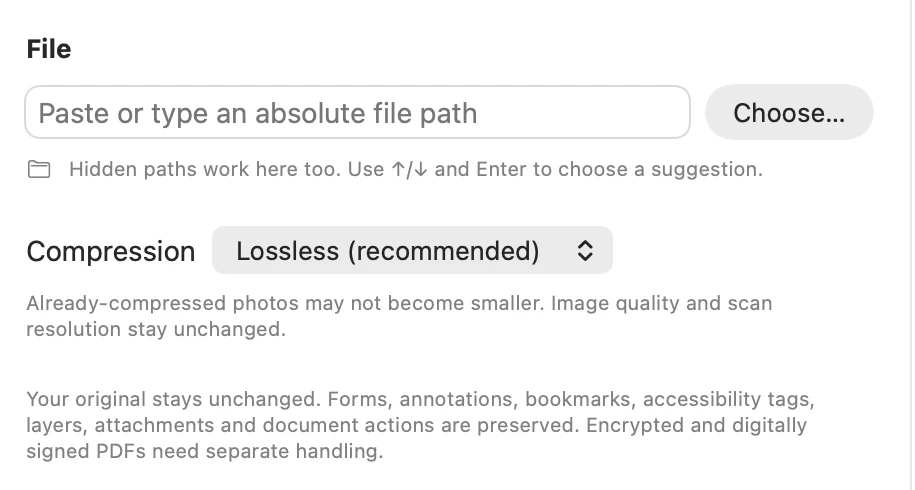
Pikebox for Mac, shown in English.
Choose JPEG quality and resolution
- Select Smaller copy (lossy) to show JPEG quality and Image resolution. Start around quality 80 if detail matters, then try 70 if you need a smaller file.
- Keep the original dimensions to avoid shrinking scans, or limit the longest edge to 2400, 1600, or 1200 pixels. This setting affects supported JPEG images and never enlarges them.
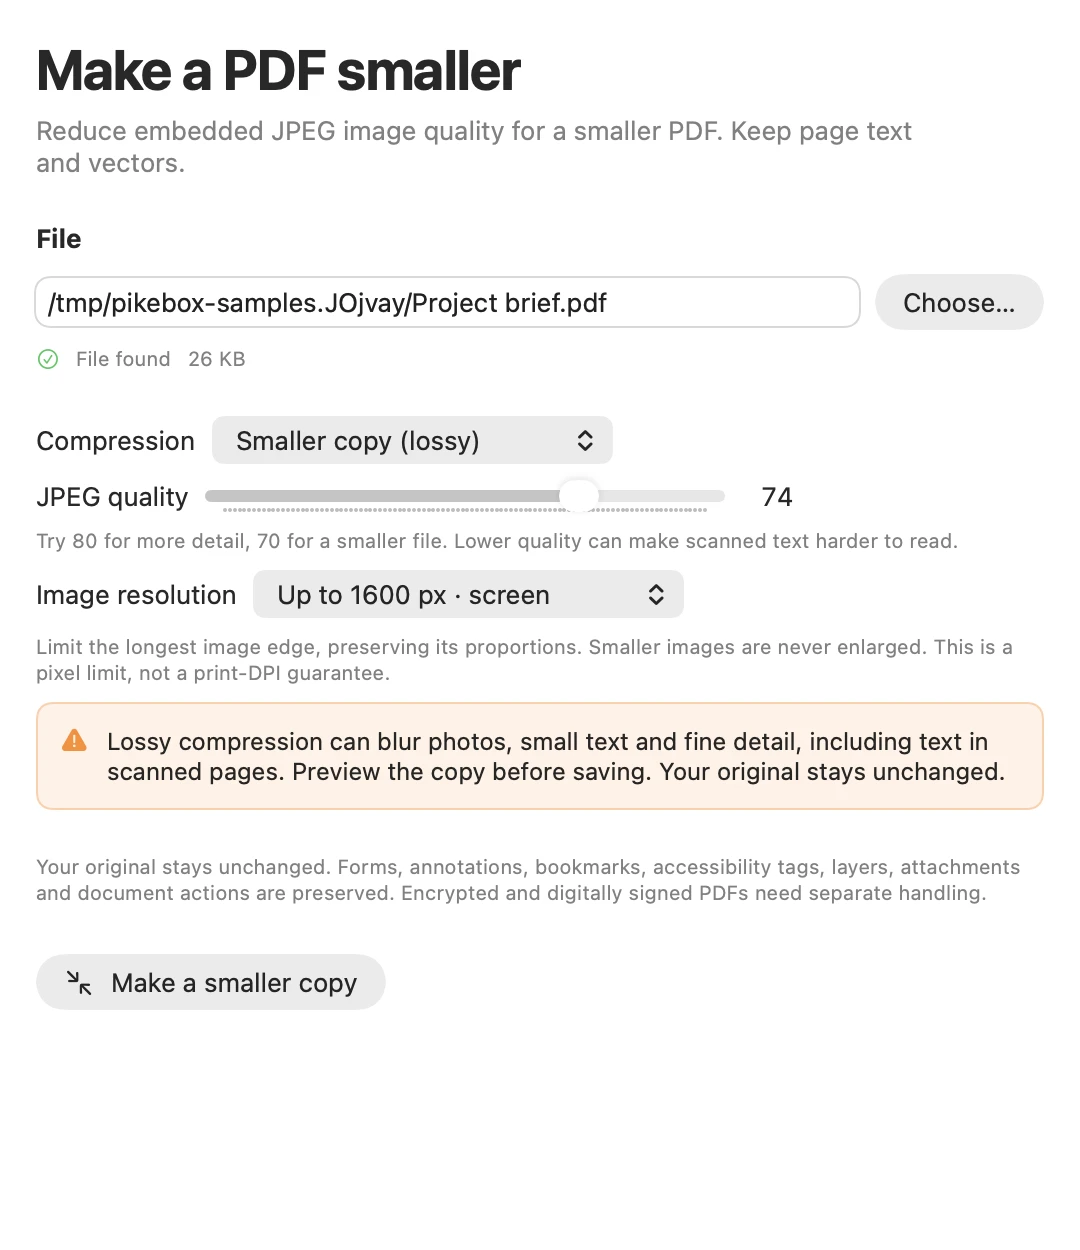
This example uses JPEG quality 74 and a maximum image edge of 1600 pixels. Pikebox for Mac, shown in English.
Review and save a smaller PDF
Compare Original size, Copy size, and Space saved. Open Preview original and Preview copy to check the same page in both, especially small text and images. Choose Save a copy… and a destination, then use Show in Finder if you need to find the saved file.
A PDF that is already optimized may have no smaller copy in that mode. If an encrypted, signed, or otherwise unsupported file is refused, read the reason Pikebox gives. To preserve a digital signature, keep the signed file and compress an unsigned version before signing it.
Organize PDF pages
Use Organize PDF pages to combine selected pages from different PDFs and images, or extract, remove, and rearrange pages from a single document. Click Add files… or drop files into the tool. Expand a file in Sources to see its thumbnails. Adding a file only makes its pages available. The New PDF area holds the pages that will actually be saved.
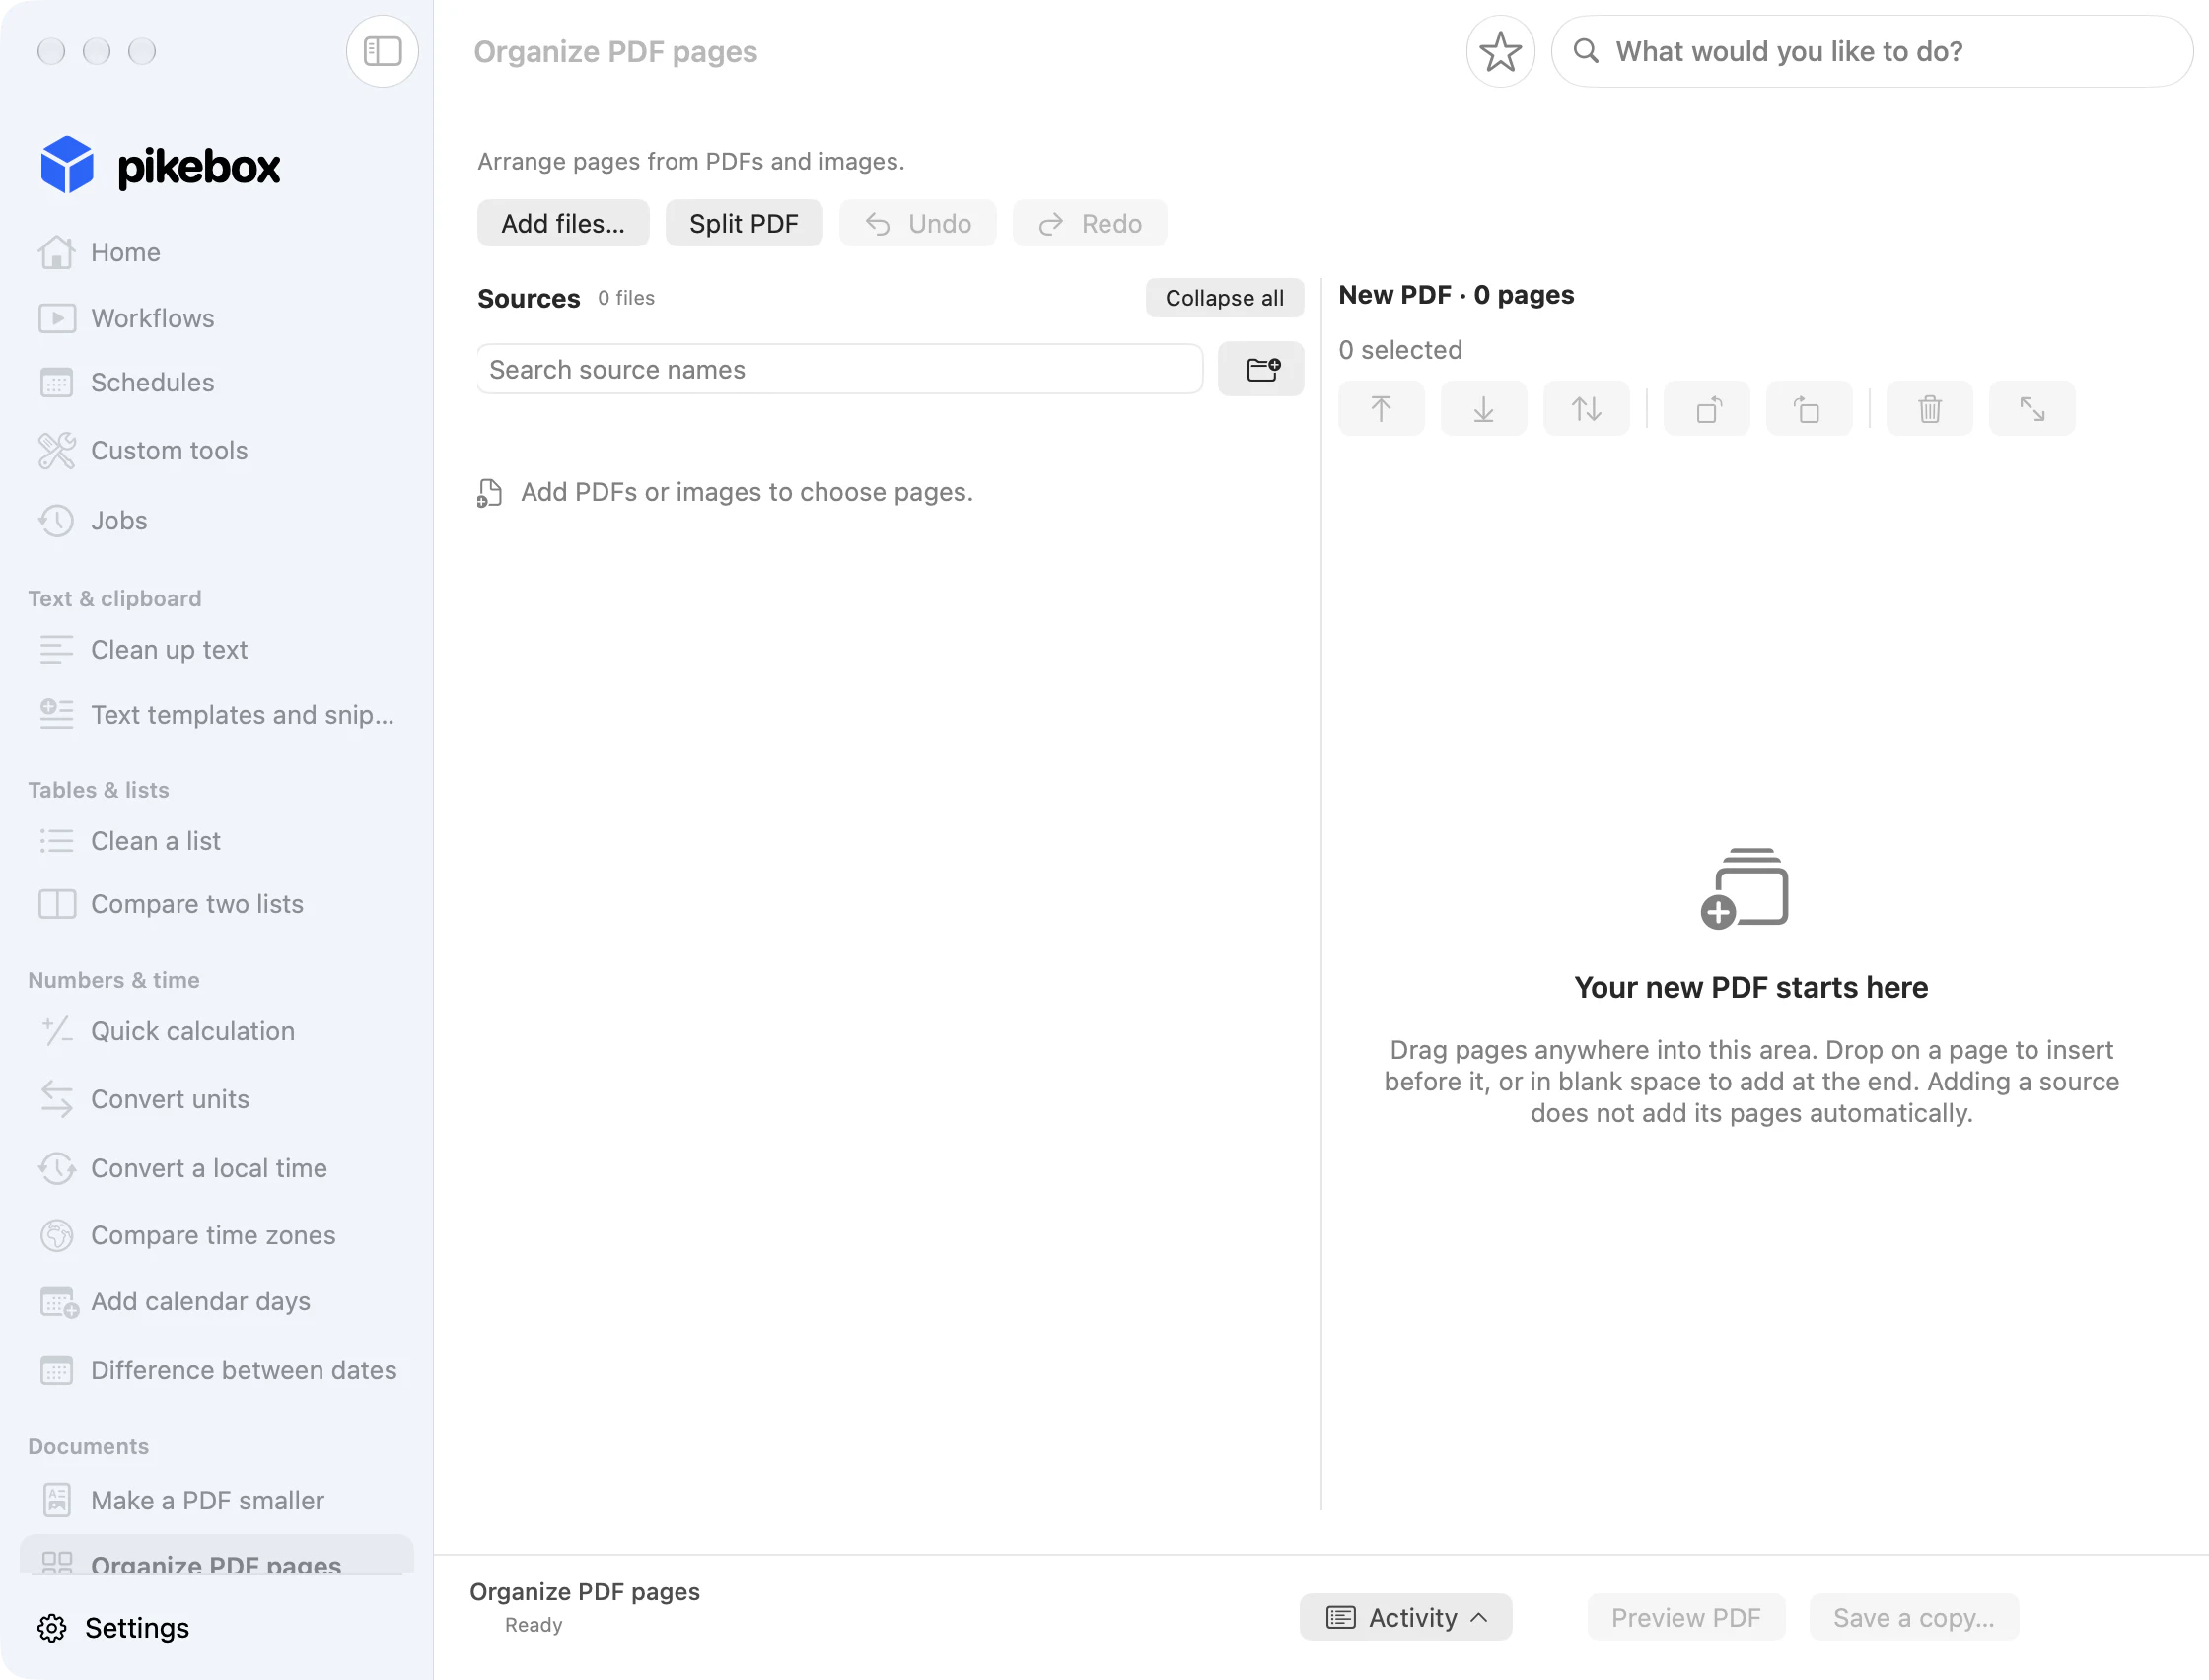
Pikebox for Mac, shown in English.
Find, add, and remove sources
- Use Add path if you know where the PDF, image, or folder is. A folder adds matching files at its top level. Open subfolders separately if you need their files.
- Use Search source names to find a source and Collapse all to close expanded lists. If a file cannot open, use Retry or Choose another file…. Removing a source keeps pages you already inserted in the new PDF.

Pikebox for Mac, shown in English.
Choose and insert pages
- Drag a source thumbnail onto an output page to insert it before that page. Drop it on blank space to add it at the end.
- Use Add all … pages to add every page from one source. For specific pages, type a range such as
1–3, 5, click Select pages, then use Insert … selected pages… and choose a position. - To extract a few pages, build the new PDF with just those pages. To omit a page from a full copy, add all pages first, select the unwanted page in the new PDF, and click Remove pages.
Insert pages without dragging
- Expand a source, select thumbnails or enter a page range, and open the insert menu. Append the selected pages, or choose Insert at position….
- For an exact position, choose Before page or After page, enter the page number in the new PDF, and click Apply. To repeat a page, insert it again from its source.
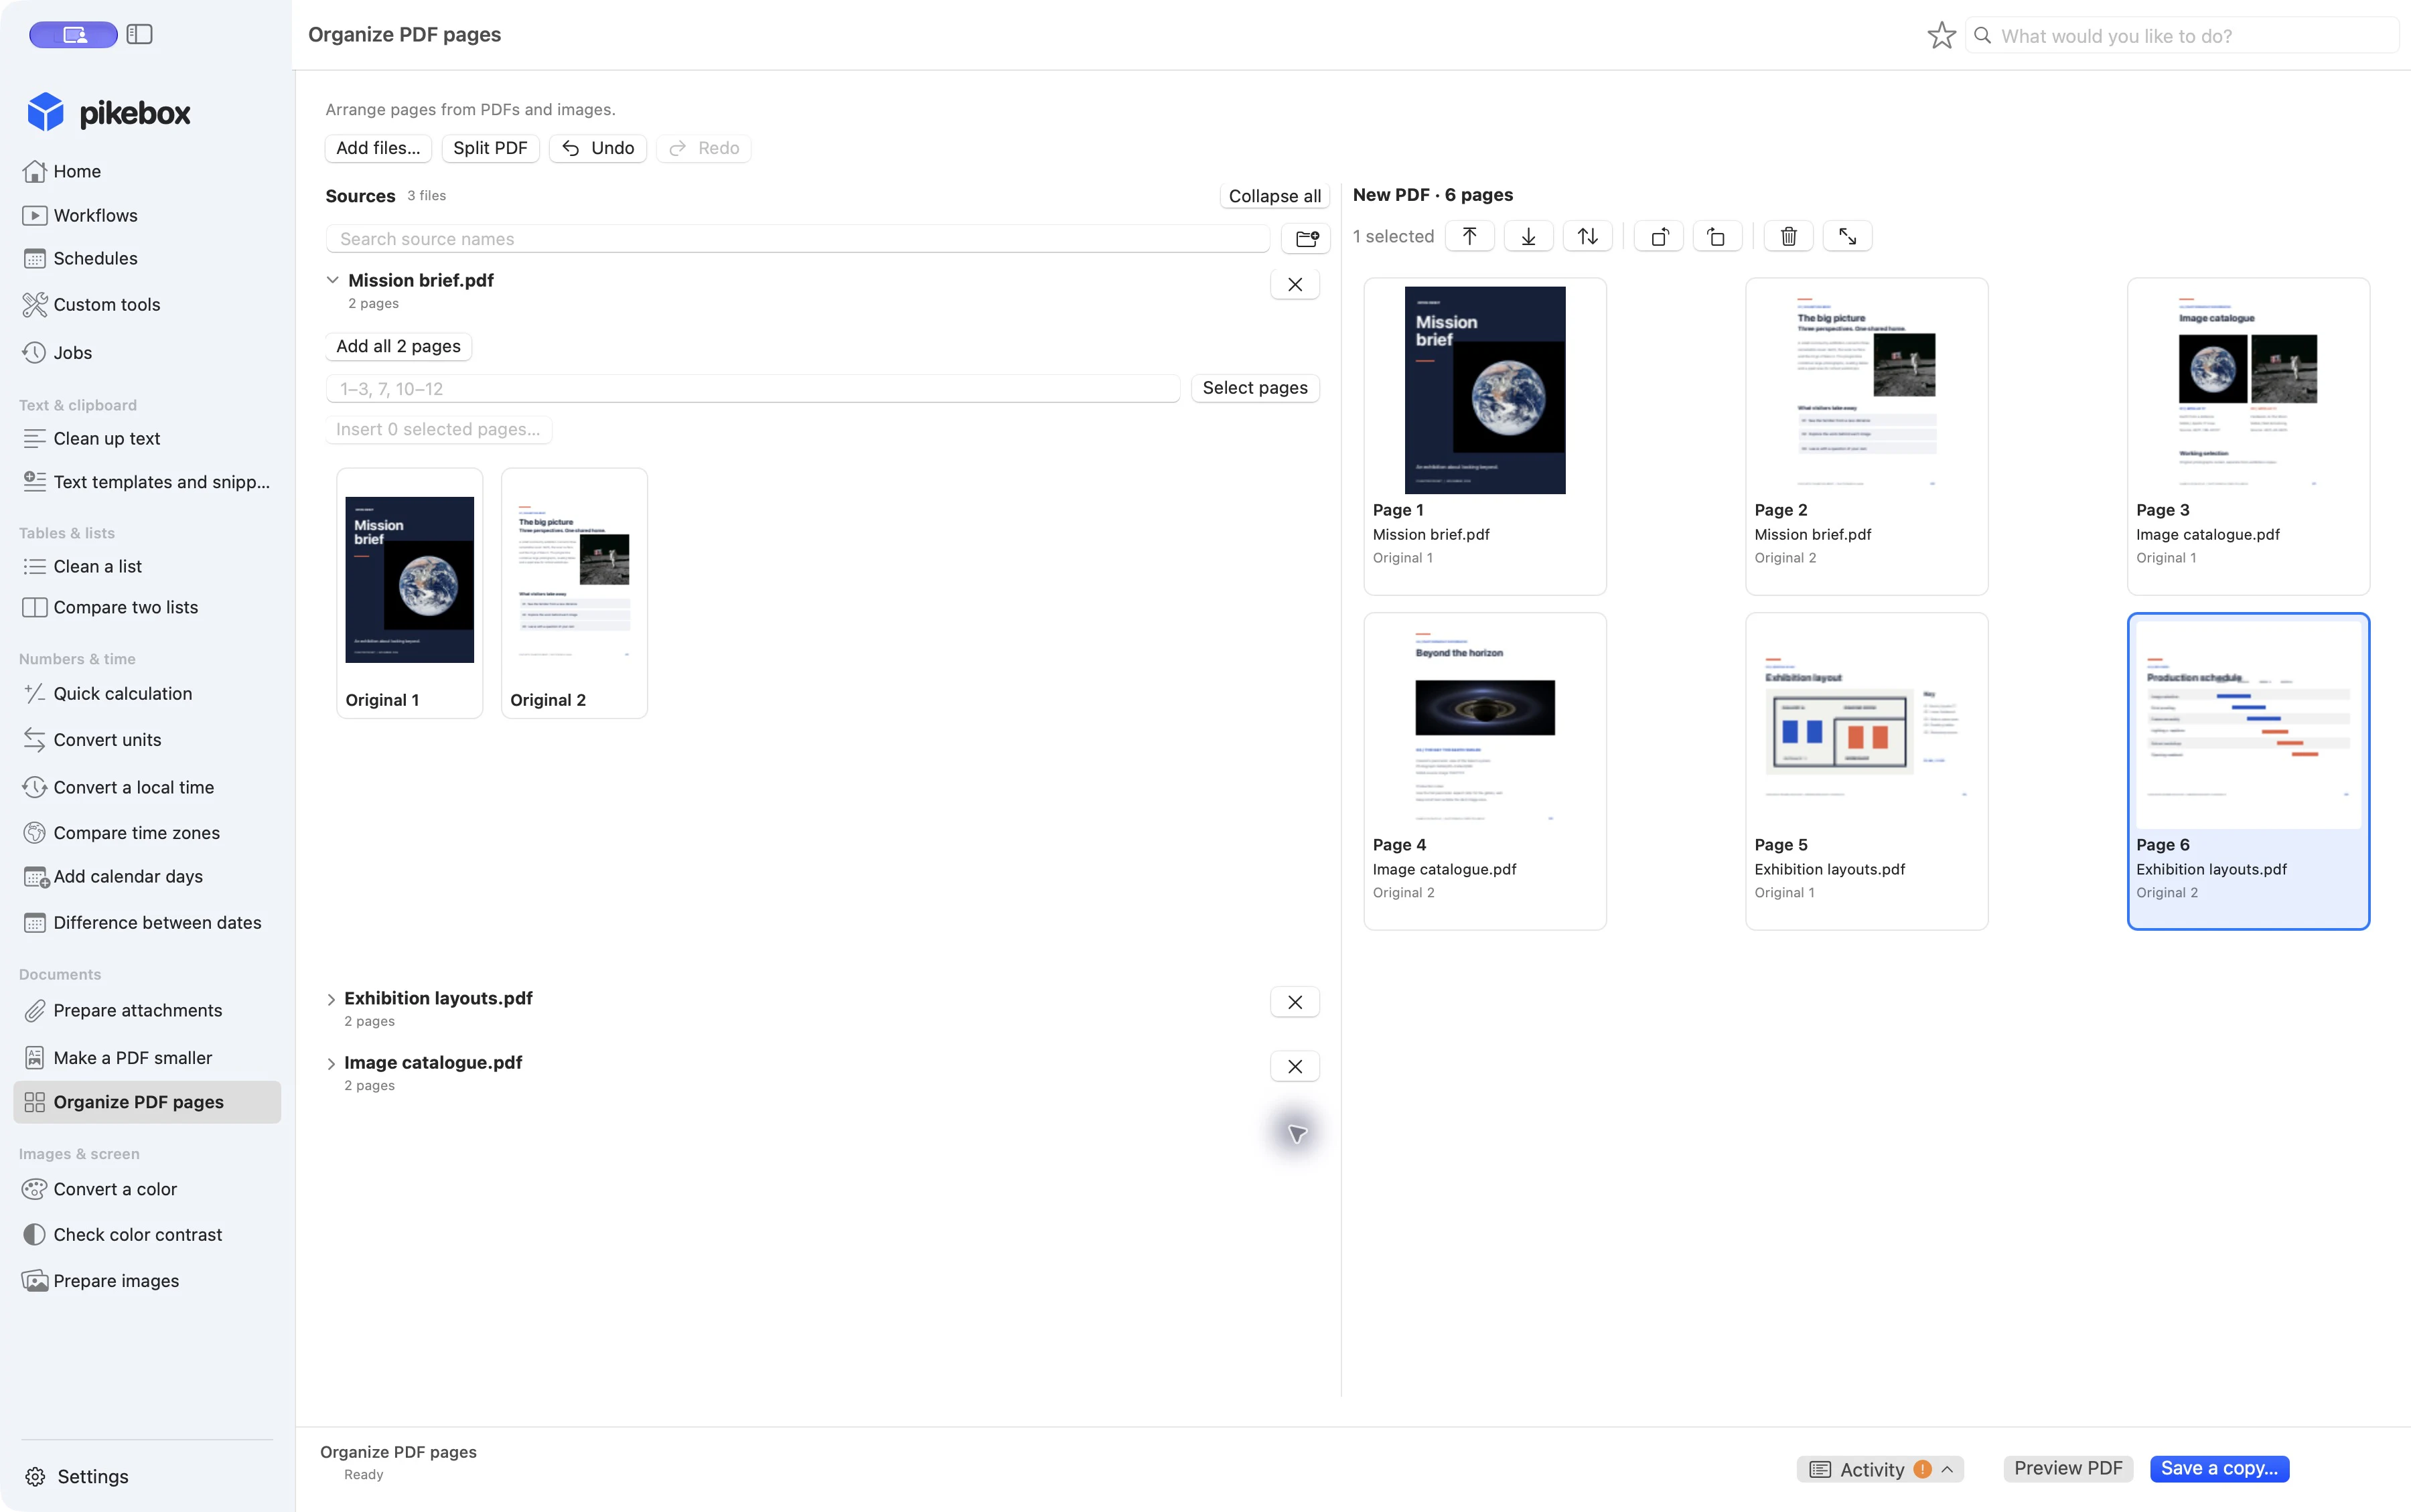
Six pages from three different PDFs, ready for review. Pikebox for Mac, shown in English.
Rearrange, rotate, and remove pages
Select thumbnails in the new PDF. Hold Command to select separate pages or Shift to select a range. Drag the selection to reorder it, or use Move to start, Move to end, or Move to position…. The toolbar also has controls for rotating left or right by 90°, removing the selection, and opening a larger preview. Use Undo or Redo to revisit a change. Removing an output page does not delete the source file.
Set the layout for an image page
Select an image page in the new PDF and open Larger preview. Choose Paper size and Orientation. Use Fit to keep the whole image in view, or Fill to fill the page and crop anything outside it. Choose the background if needed, then click Apply page layout.
Choose paper, placement, and color
- In Larger preview, use Match image to base the page on the image, A4 or Letter for standard paper, or Custom to enter a width and height in points. There are 72 points in an inch, with a limit of 14,400 per dimension.
- Choose portrait or landscape. Use Fit to keep the entire picture or Fill to crop it to the page. Pick a background color for uncovered areas and apply the layout to the selected output page.
Preview and save the new PDF
Open Preview PDF to inspect page order, orientation, and contents. If you change the order again, refresh the preview. Choose Save a copy… and give the new PDF a name. If Pikebox reports that a save has not been confirmed, use Check save before retrying. Check the message if Pikebox refuses a page edit. For example, a bookmark or form may still point to a page you removed.
Check the preview and recover a save
- Move through the checked PDF with the page arrows and inspect detail at Fit page, Fit width, or a zoom percentage. If the draft changes, open the preview again before saving. If available, use Retry with a smaller preview when the preview cannot fit in memory.
- If a save outcome is uncertain, click Check save before repeating it. If a copy already exists at the destination, use a new name or folder. A failed preview leaves the draft in place.
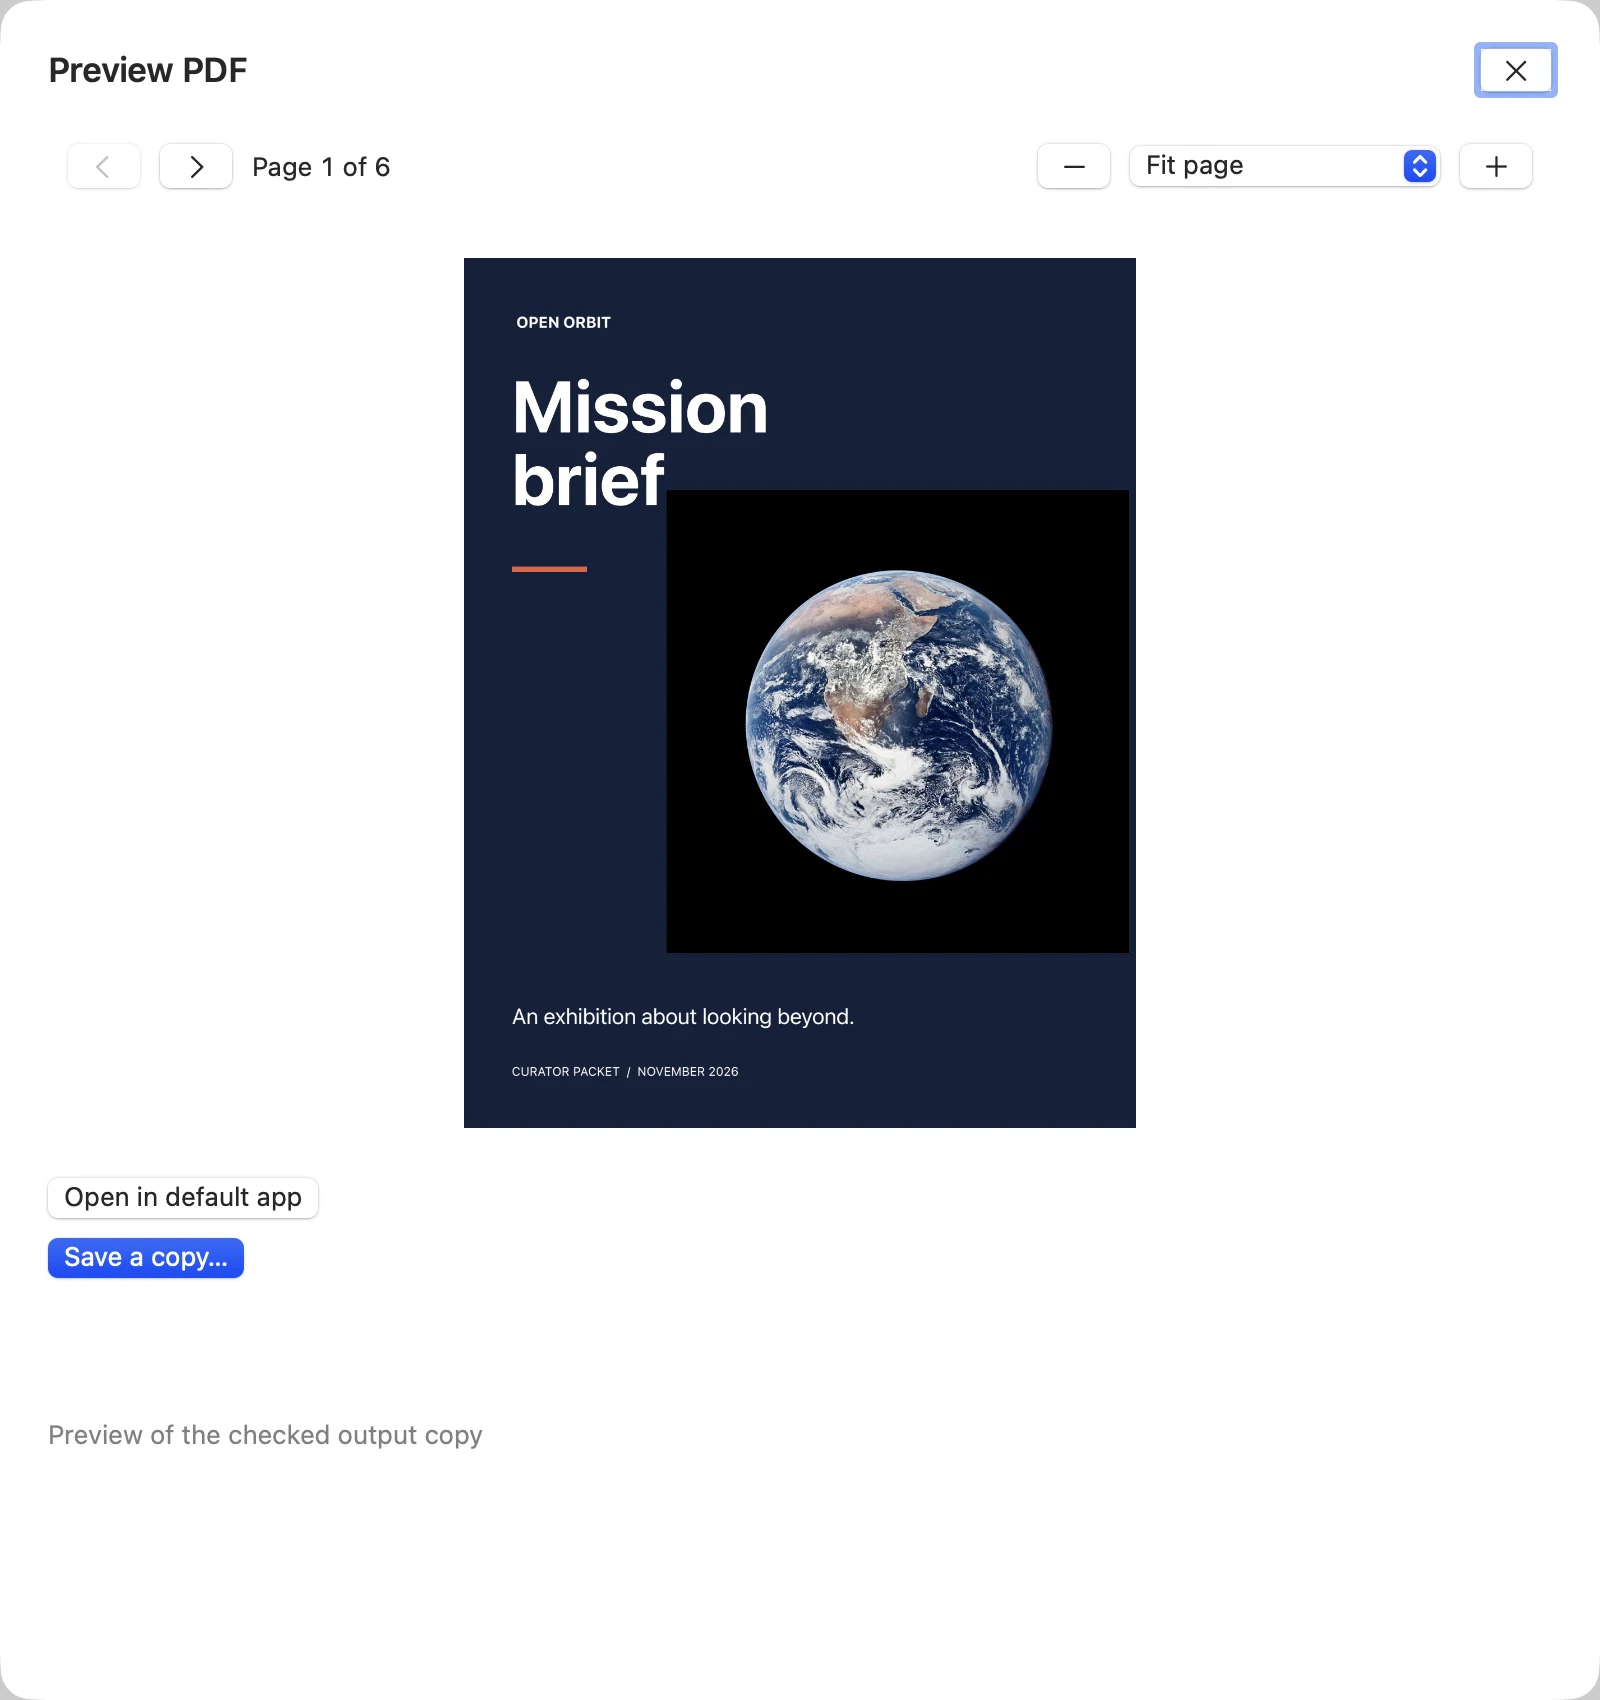
Use the page arrows to inspect every page of the checked copy before saving.
Split PDF
Add an unrestricted PDF with at least two pages, then choose Split PDF if the button is available. Select the original PDF. Choose One copy per page to save every page separately, or Page groups to decide what each copy contains. For example, 3, 1; 2 puts pages 3 and 1 in the first copy and page 2 in the second. Use Choose folder and save… and check the saved count. If saving is uncertain, use Check save. Keep signed PDFs intact and use an unrestricted, unsigned copy for splitting.
Specify the split copies
- Use One copy per page for one output per original page. In Page groups, use commas between pages in a copy, a dash for a range, and semicolons between copies. For example,
1–2; 5, 3makes two copies and puts page 5 before page 3 in the second. Create 2 to 100 copies with up to 256 selected pages in total. Use each page only once. - Choose a folder and save. If Pikebox offers to open Jobs, use the job entry to check which copies completed before retrying a failure.
Edit a protected PDF
If a source is marked Encrypted PDF and offers Edit protected PDF…, open that action. Enter the pages in their new order, such as 3, 1–2, and provide the PDF owner password. The password that only opens the PDF is insufficient. Choose Verify & Save… to write a separate, checked copy with the original encryption and permissions. This action accepts one AES-256 (R6) PDF up to 64 MiB and 256 pages.
Use the owner password and verify the copy
- Enter the owner password in the protected edit dialog. Pikebox accepts 1–127 printable ASCII characters for this operation. An open-only password cannot authorize a page change.
- Review the ordered selection, choose Verify & Save…, and pick a destination. When the copy is saved, open the job or reveal the file in Finder. Check the original save first if its status is uncertain.
Prepare attachments
If your build shows Prepare attachments, use it for a group of files that must fit within one limit.
- Click Add files… and add every required file. Set Maximum total size and its unit. An email or upload service can add overhead, so leave room if needed.
- Select each file to review its Compression and any format, resolution, or quality requirements. Enable Allow reduced image quality only when that file can lose detail.
- Click Run. If Pikebox opens Review PDF image quality, review the listed settings before approving them.
- Check the Selected size and whether it fits before choosing Save all copies…. If more space is needed, revisit the limit or the individual settings. If a save needs attention, inspect that file’s status and retry only the remaining copies.
Set requirements for each attachment
- Select one file in the list. For a PDF choose from the original, lossless, structure optimization, or JPEG quality 80. For a JPEG the reduced-quality preset uses quality 82. PNG can use lossless compression, and supported WebP, TIFF, BMP, and static GIF files can be offered as PNG.
- Enable Allow reduced image quality only for files that can lose detail. Set a minimum JPEG quality, allowed format, pixel dimensions, or print resolution only if the recipient requires them. A stricter requirement can make the total limit harder to meet. Leave Any format selected if any format is acceptable, or choose PDF, PNG, JPEG, WebP, TIFF, BMP, or GIF. A dash beside Minimum JPEG quality means there is no minimum.
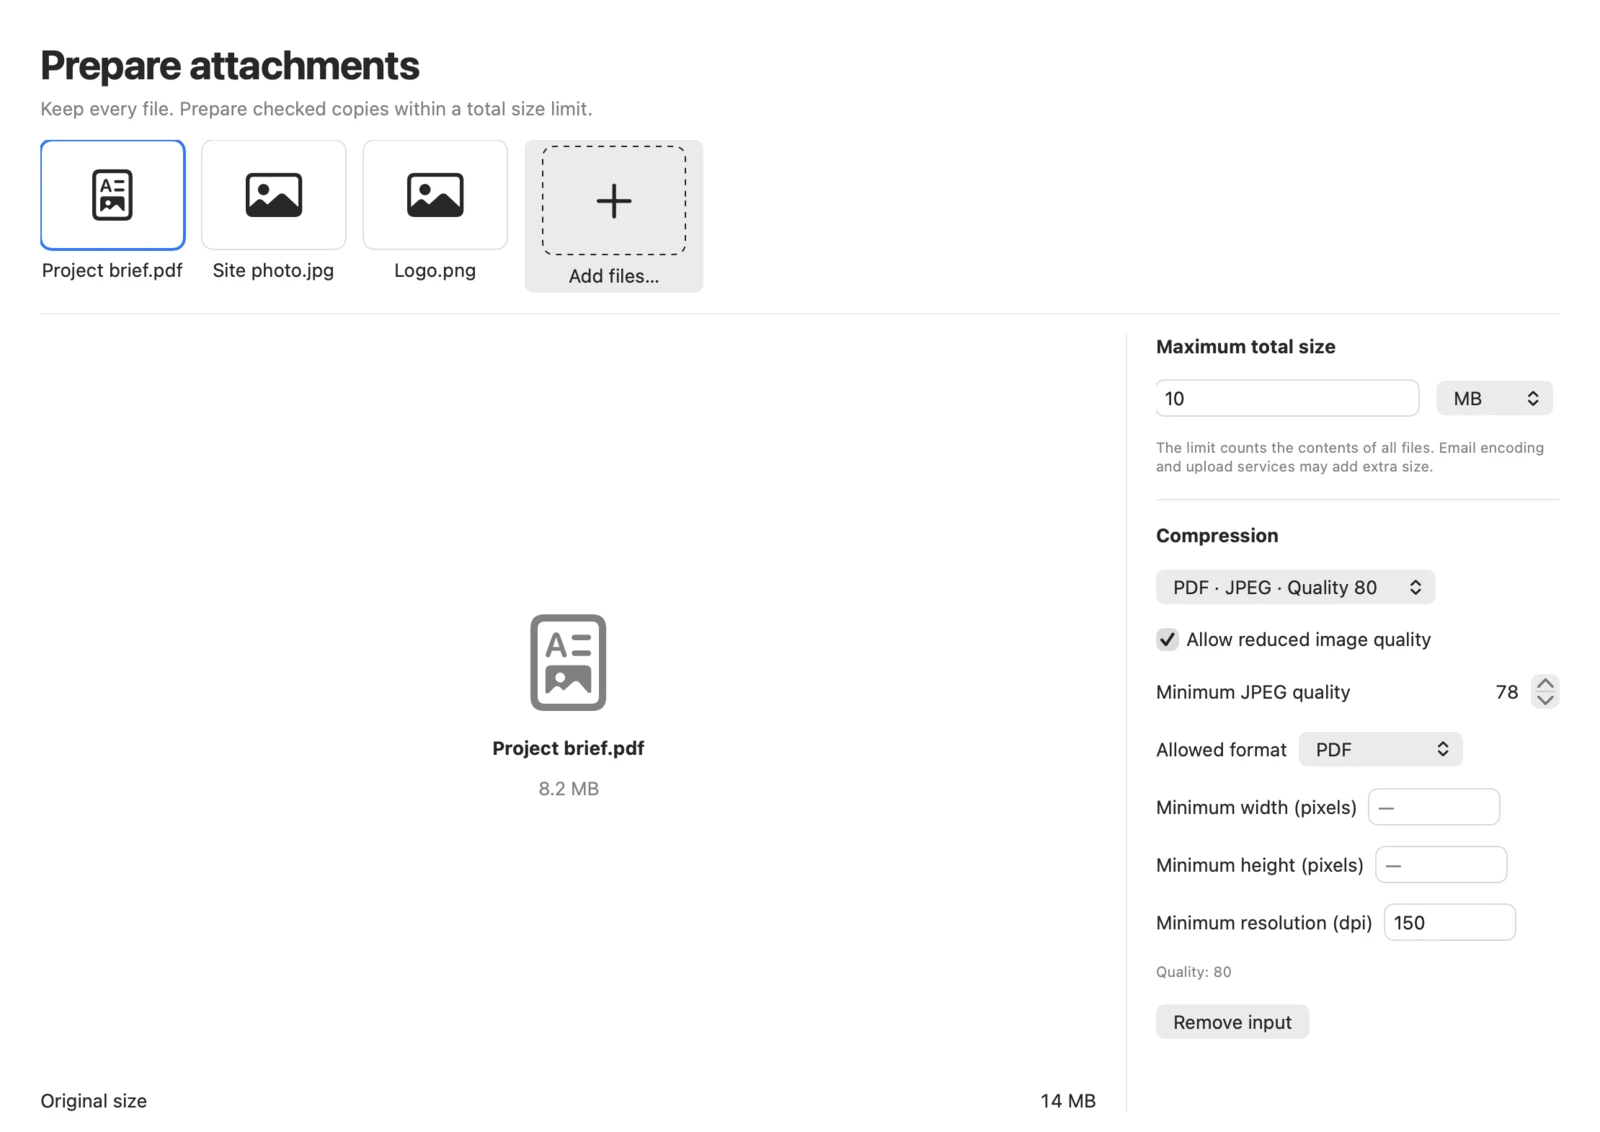
Three attachments total 14 MB before preparation. The target is 10 MB. Pikebox for Mac, shown in English.
Review the total and save remaining copies
- Click Run to prepare a set. If Review PDF image quality appears, read the settings for each PDF before choosing Approve these settings. Compare Original size and Selected size. If the set needs more space, change the limit or individual requirements and run again.
- When the set fits, choose Save all copies… and select a folder. If some files fail or a save needs checking, open the job from Needs attention and review individual receipts. Use Save remaining copies… for the remaining copies.